What did you do to your non-G body project today? [2022]

Status
Not open for further replies.
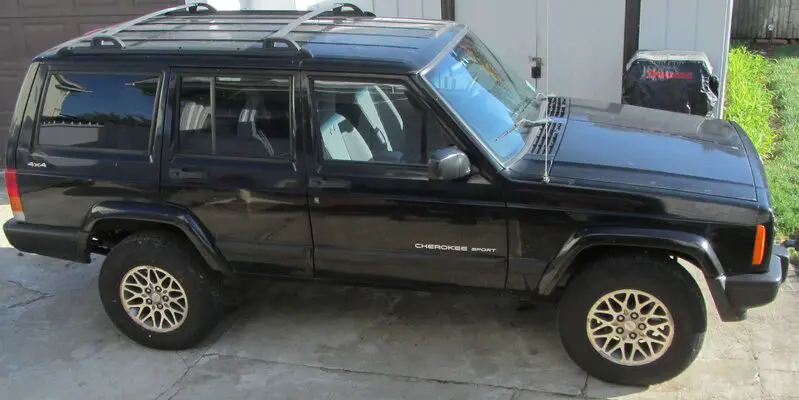
I put the normal shocks on the GYP today. After putting new heavy duty rear springs in, the coil-over shocks added too much lift. I used some Gabriel Pro gas shocks so they would not add to the lift. They were recommended for heavy duty and towing so I figured that would fit the bill. I like the stance and if it does droop over time I have the coil-over shocks stored. IMG_0510_02.JPG
 
  • Like
Reactions: joesregalproject
Cut up this red oak. Been on the ground a few years. Was gonna mill it but it has been too long and the wood has gotten punky on the top and bottom so it's firewood now. About 2 cords laying there. Might be a few bowl blanks in there. First time I've had the 461 out in a while.
20221015_162717.jpg
 
You said it brother! Densely populated and surrounded by idiots! LoL that about sums up new jersey from ocean county north and new York Staten island north up the Hudson and out Long Island. All way over populated.
I didn't get any shots and this isn't the first time I've had this. Well a form of this. I had it like 2 years ago but that time it barely effected me. This time I wanted to die at one point so it would be over. But it's over now Lauren is much better I'm a lot better Janet has it now so I'll be doing the cooking this week. Lauren is ok with that though lol tonight I made steak on the grill for us all and Portobello's stuffed with lobster and crab. All on the grill of corse. I saved some steak tonight for tomorrow morning I'm making us all omelets with peppers onions stake and cheese for breakfast. I don't know what I'm doing for lunch but I'm firing up the smoker and making ribs for dinner. Maybe I'll smoke some hot dogs for lunch to keep it simple.
 
Today I've been working on drawing up some low-cost plans to build an 11x18 detached workshop/paint bay. Reality is we need somewhere on-site to do cutting and repair work beyond what we've currently got.

Considerations:

#1 - keeping out insects of the termite, ant, and wasp category... add snakes for what that's worth.

#2 - keeping the cost as minimal as possible, homeowners, property taxes, anniversary, Christmas, and wife's birthday are all due in the next 2 months.

Concrete costs being what they are, I've considered doing something with a wood frame. Located some 8" I-beam salvage where I can get (5) 13 ft sections and (3) 12 ft sections for $200. I also read that build code provides that a 12 ft joist spaced 2ft OC can be rated to support loads similar to what a moderate car gives, although, building code won't matter. Locality specifies a structure of 199sf or less doesn't need any permits or inspections, thus the 198sf size of 11x18. Saves me survey costs and inspection fees, an easy $1000 alone.

Curious is anyone here has built something wood frame floored to park ~3600# or less vehicles in?

Ground contact lumber isn't what it was in the good old days so that makes me wary, circle back to the I beams with wood frame on top with a gravel ramp up to the floor level.
 
That's in pretty good shape considering the road salt up there..
It is, but I have replaced the entire pass side floorboard, part of the driver side floor, the trailer hitch dissolved, and the front end/steering was completely rebuilt. I keep touching up the paint but our NYC polluted air is slowly eating it up.
 
Yesterday, I replaced the points on my Kohler 12HP horizontal shaft motor in my Cub Cadet122. However, in the process, I found the following issues: i.) motor appears to be out of another brand of tractor; ii.) appears K301 motor is mounted to cross-member beneath base of motor without original spacers; iii.) motor is sitting too low in the frame to remove the bottom screw on the points cover; iv.) I had to cut a 1/2" notch in frame rail to access bottom screw on points cover; v.) found the lead from coil negative to points was pinched between frame and motor (wire's insulation was rubbed raw to copper); vi.) I replaced wire from coil negative to point and installed wire loom loops to keep the wire positioned properly; vii.) I was unable to find flywheel timing mark (through little inspection hole); viii.) I found TDC by measuring points plunger's maximum position.


IOW, I changed a set of points the hard way. I got this CC122 as payment of a debt owed to me. Clearly, I got the short end of the stick despite the CC122 running when I got it. Clearly, whoever's installed the non-CC motor was a butcher. Real question is: what f-up will I find next?
 
DSCN3466.JPG


DSCN3470.JPG


DSCN3467.JPG


So these are just a few shots of the boxes, packages, and assorted other items that used to reside on the dedicated work bench for my Indian Chief project. Since this is not really a bike forum, this particular adventure does not get all that much post time but, given the shear amount and weight that has accumulate on the existing bench, I figured it might be time to decommission what I had rigged up and fabricate a completely new bench in its place.


DSCN3468.JPG


This is the hutch that I made at one point to sit on top of the old bench. It will remain as is and be put back onto the bench once it is assembled.


DSCN3471.JPG


DSCN3472.JPG


These are the main leg assemblies for the new bench. I chose to employ the same type of structure that I created for my primary work bench out in the shop. The material is 2x4's held together by 5/16ths x 5.5 inch capscrews. Once the cross ties are attached they will span around 36 inches and the frame will be 26 inches wide with a 36x 48 table top.


DSCN3480.JPG


DSCN3481.JPG


A couple of detail shots of the finished infrastructure. All the cross beams are secured in place using #8 deck screws. As it stands, there will be room below the table top for two shelves that will accept all the big and heavy components such as gas tanks and flywheels. Gets them out of harm's way and somewhere safe.


DSCN3474.JPG


DSCN3475.JPG


And here is the hutch, newly re-introduced to its brand-new bench top.


DSCN3477.JPG


48 inches of bench top depth lets me center the hutch so that I have 16 inches of work-space on either side of it. Of course most of this new space is going to disappear under a mess of bits and pieces like it did before, that being the fate of most empty space in anyone's shop.


DSCN3478.JPG


Turns out that my supposed 36 inches of width was actually an 1/8th under. No matter, the hutch gets centered both from front to back and from side to side. The sides are just enough to stash spray bombs of cleaners and degreasers along with some skinny trays for WTF's that tend to accumulate.


DSCN3482.JPG


And finally, what it took to put it all together, mostly. My saw deck is out in the shop and needs some serious love from a vacuum before it is ready for its picture to be taken. Like most of my shop, it too is on wheels so I can move it around as needed and then return it back to its parking spot, out of the way until next time.

When my Dad was still alive the basement was the bane of my Mom's existence as He would often not head down to work on one of his projects until later in the evening. I can remember being in bed and going to sleep on many an evening with my lullaby being the thunder of the motor on his circular saw and the scream of the blade as it ripped its way through boards and panels.

He never got to see any of my work with metal and wood. Sometimes I wonder if he is sitting wherever and watching what I periodically dream up. Guaranteed that, if he could, he'd grumble about something., or not.


Nick
 
  • Like
Reactions: xcookpac and Wraith
Status
Not open for further replies.

GBodyForum is a participant in the Amazon Services LLC Associates Program, an affiliate advertising program designed to provide a means for sites to earn advertising fees by advertising and linking to amazon.com. Amazon, the Amazon logo, AmazonSupply, and the AmazonSupply logo are trademarks of Amazon.com, Inc. or its affiliates.

Please support GBodyForum Sponsors

Classic Truck Consoles Dixie Restoration Depot UMI Performance

Contact [email protected] for info on becoming a sponsor