What did you do to your non-G body project today? [2022]

Status
Not open for further replies.
Back to model building-

Blew all my car project funds on my pickup so I gotta rebuild my GP & Cutlass fund.

These 2 are actually going to Switzerland. Dude messaged me on my FB page and said he was going to be in IA for one of the big model & collectable shows and asked if I could built a pair of combines for him. That will make 3 continents I have stuff, kinda cool (Europe, Australia, North America)

Pre paint, from the 3d printer
1666709771226.png


Post Paint
1666709794276.png


Mid assembly
1666709803950.png


Done
1666709816257.png

1666710054999.png

1666709826984.png
 
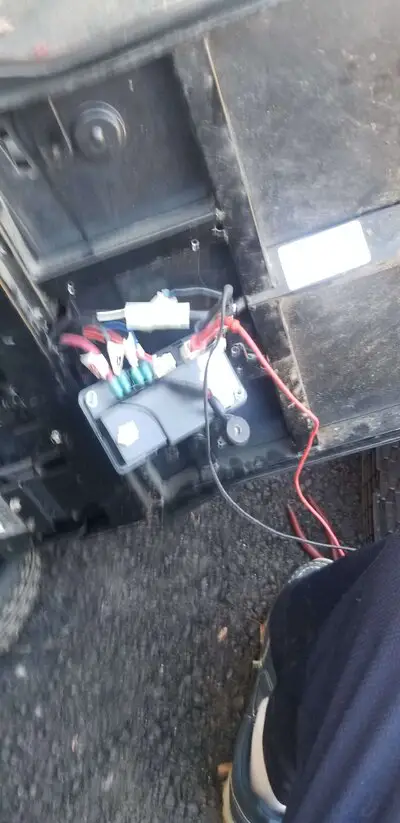
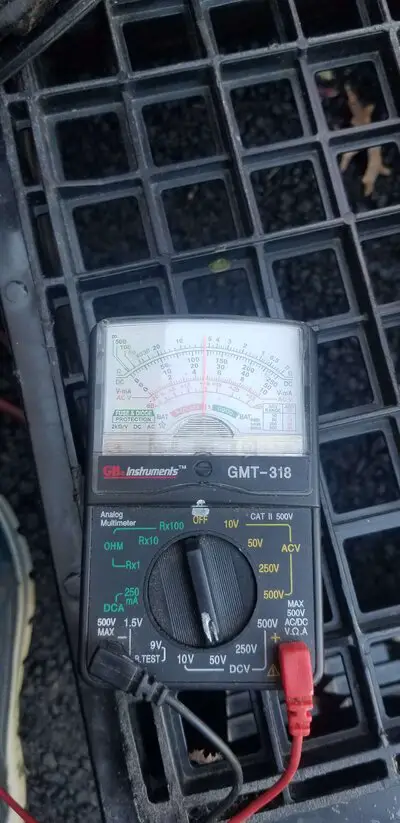
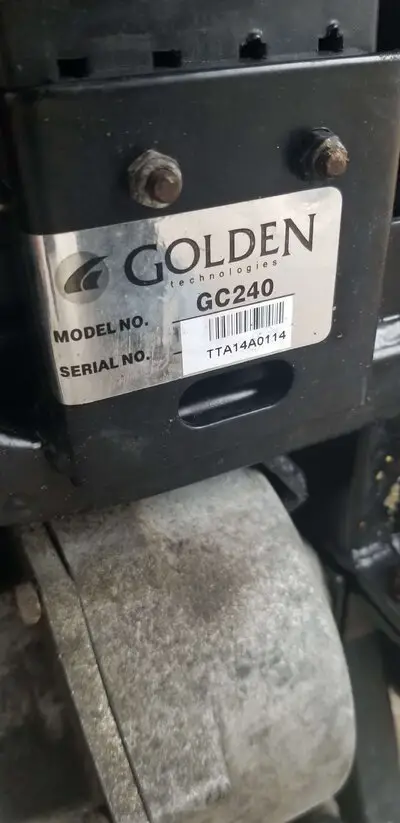
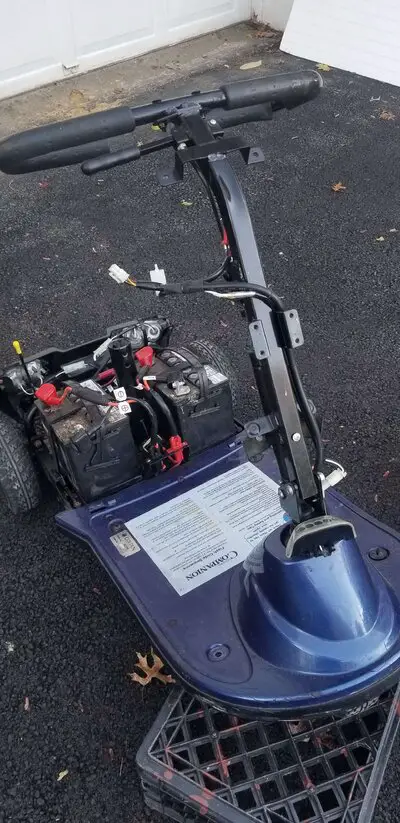
Repaired my deceased mom's scooter: a Golden GC240 three wheeler. First time, working on one of these extensively. Two 12V batteries coupled to produce 24V operating voltage which in turn goes to controller. Harness from controller goes to dash and on-off switch.

Turns out i had a break in harness between controller and dash/on-off switch. Repaired harness and soldered loss conections on dash. Now it works.
 

Attachments

  • 20221027_123404.jpg
    20221027_123404.jpg
    434.6 KB · Views: 60
  • 20221027_123408.jpg
    20221027_123408.jpg
    460.5 KB · Views: 70
  • 20221026_125522.jpg
    20221026_125522.jpg
    313.5 KB · Views: 61
  • 20221027_170853.jpg
    20221027_170853.jpg
    819.2 KB · Views: 67
Summarily, recapping bench project part One:


DSCN3493.JPG


A mere two weeks later, my first bench has pretty much disappeared behind the volume of boxes that have been returned to its shelves. It still has some bits left to be added but my attention had already been diverted at that point.


DSCN3488.JPG


DSCN3490.JPG


So this is my 47 Indian Chief Project, appropriately buried under a layer of boxes, as most projects get to be at one time or another. Although still in a bitsa stage, most of the parts needed to assemble and complete it are already on my shelves. The choke point is time, of course.


DSCN3491.JPG


DSCN3492.JPG


Back to the second bench project, what you see here are a couple of shots of the end frames. The rails for them are 2x4's, cut to length, jigged, squared, and clamped together, and bolted together using 5/16ths x 5.5 inch capscrews, c/w flats, locks, and nuts. Minus the wheels they stand about 28 inches tall. Add the wheels and their mounting plates and the height rises to just under 32 inches. The top plate brings the total height to right at 32.


DSCN3494.JPG


Progress, the front stringer has been set in place, clamped, adjusted for square, and screwed down; same-same at the other end. The back stringer awaits its turn.


DSCN3496.JPG


The bench substructure, together again. For the WTF does that mean that may have arisen, this is not the first version of this framework. This is actually version Two.

When the first iteration got assembled, I discovered that it was racked. The internal angles weren't square and the cross measurements showed almost a 1/2 inch of difference. Even when I used the long tube clamp to attempt to shift the stringers, while they moved, it wasn't enough and releasing the clamp let them go right back to unsquare again.

That bothered me to the point that I blew the stringers back off the end frames and took them all back out to the quarter deck and put them on the sawhorses. A 4.5 inch mini-grinder does not make the best of sander/finisher tools but, with a little perseverance, I managed to get the frame corners milled down to square and the stringers properly matched for length. Being able to cut them on the sawdeck would have saved some of the hassle but iits throat is not deep enough to execute a complete cut in one pass.

AS it sits in the above picture, all the internal angles are square, and the diagonal measurements are identical at 49and 3/16ths + inches. Close enough.


DSCN3498.JPG


Back to being a useable work table again.


DSCN3499.JPG


The dust hasn't even settled yet and it is already accumulating "stuff". I chose not to square the top plate to the substructure but instead shifted it to one side to move the framework back and over. What that does is to create a sort of bridge at one end that actually mates up to its counterpart on bench One. Between the two, I have around 5-6 feet of overall width which can accommodate long items without droop or sag.


DSCN3500.JPG


A few of the cast of characters that came together to help with the measuring and assembly. Missing from the group shot are the sawdeck which, by virtue of size and weight is mostly exiled permanently to the shop/garage/cold storage/welding shop/???, and the 4.5 inch DeWalt mini-grinder, still set up with an 80 grit flap wheel for wood working!!! 😀


DSCN3501.JPG


DSCN3502.JPG


Finally, for the carnage lovers, a couple of "what happens" shots of what occurs when you over stress the bottom end on a vintage Harley Davidson mill. I believe the appropriate term here is "BOOM"!!😲

This pretty much concludes my adventures in bench building for the time being. Bench Two replaces the last plastic sawhorse based version that had previously supported a fair amount of m/c related components and tools.

For the curious who might wonder why I would employ cheap supports, we--ell, because they Were Cheap, which met my budget at the time, available, which satisfied my immediate need, and actually able to support a lot more weight that you might expect. The big downside to them is that they do deteriorate due to U-V exposure over time and aren't all that sturdy, meaning you have to set limits on how much weight you set on them or they can just fall flat when you least expect it; like at 3:15 in the morning, or while you are off at a run or swap meet, trolling for more "stuff"


Nick
 
  • Like
Reactions: Clutch and xcookpac
It seems that work benches must be magnetic 'cause they sure seem to attract stuff.


DSCN3503.JPG


DSCN3504.JPG


So far my new work bench #2 seems to be living up to the reputation of benches as a whole. So far it has managed to re-become the location for my wheel truing stand as well as a couple of misc boxes and an assortment of assorted debris that has to be sorted for use or disposal,


DSCN3505.JPG


Drool if you want to, just provide your own towel. What you are eyeballing is an Isky 256H cam. Along with it there is a complete set of lifters, pushrods, roller rockers, and polylocks, plus the necessary gaskets for the swap. This little collection of gems is destined to go into the 305 in my 85 M/Carlo SS. Until that happens, here they sit, safe and sound, on my new work bench. Barely visible in behind is the AGM battery for my 67 HD Shovel,

As pro bono shot,


DSCN3509.JPG


The screen mesh is somewhat obscuring things but this is Fender, and yes, he is named after the guitar. He is my neighbour's cat, around 15 in human years old. Evidently, he found the doghouse storage shed under my kitchen window to be a nice place to curl up in the sun. We aren't friends, I had to roust him out of my flower beds too many times when he was younger, plus he managed to get himself trapped in the attic of my shop while on a mission to hunt some non-existent pigeons. Hadda pull one of the 'tween joist block off panels so his owner could climb up and get him out. Needless to say he now avoids my shop as if it were some kind of cat hell zone.

He also has something of an addiction to the scent/smell/odor of my Shasta Daisies. Something akin to catnip; he just lays there and smiles.
Today he came a callin' around supper time and I just left him in situ to enjoy the sun and think cat thoughts. He is getting old and now prefers to stay close to home rather than going feral for the summer and then returning to hearth and humans in the fall. Least he has lived to come home, Old yellow eye, the one eyed feral that used come around, hasn't this year. Not hoping that the animal control people got him, they don't put out ferals for adoption and that cat was too skittish to be happy around humanity. Probably either died or was killed last year. Bother.


Nick
 
  • Like
Reactions: Clutch
Nothing. my ab muscles are spasming again and life is not exactly conducive to crawling under things and wreaking havoc. Not sure as to the why-for just something that comes and goes. LIkely just a symptom of r-arthritis.


Nick
 
  • Sad
Reactions: Streetbu
Stumbled across some long lost spare parts for the g-series van that has no certain fate for being fixed... or not.

I'm talking the roughly 1973-1996 era chevy/gmc vans.

Now I know online info is sketchy at best, partly because, you know, internet. But the tricky thing with these vans is gm used the same name and designations for everything from a 2wd shorty, to a 4wd, to dual rear wheel cab and chassis.... so.

I know there's a few of these things on the board. CopperNick has one. And I know I've seen a few others. Here's my question for those in the know - and I know factory rims, optional tire sizes skew stuff.

How wide is the wheel track on these things as far as fitting on a dolly to move one? Too long for my trailer, or uhauls, as I'm dealing with the extended wheelbase. Also the SF 14 bolt so just standard offset wheels, not the wider track youd see on a FF truck. But it's about 4 hours away each direction to measure it. Thinking of hauling it home on one if I can line up it fits ahead of time.
 
Huh! So I wake up and Hey, hey lookie here.

CK80, how fast do you need that measurement? And, if it helps any, my 1980 standard body G-10 Van fits just nicely side to side on a ro-ro or dolly hauler; found out the hard way this summer when I dumped a U-joint in heavy traffic.

I will be heading into the shop briefly this afternoon and can put a tape to the rear end, wheel outer to wheel outer. My rims are not steel but they are GM factory aluminum; came from a Vandura conversion ??? decades ago, so the offset/backset for them is pretty much GM stock. What I can do is take a measurement for both ends, front width and rear width. That could give you what you need if you are using the steel stockers. I do know that they are 15x7 and 5 bolt/five inch and will also fit my S-10. I can also get you an axle to spindle length for it jic.

As for the whole history bit. GM vans came in short, standard, and extended wheel bases. You don't see much of the long body units; they mostly went to commercial and industrial purchasers and got worked to death as technician vans. Mine actually spent five years hauling candy and confectionary/vending syrups for a vending company. I knew the back history of it from the day it came to the branch to the day it was surplussed and put up for sale. I wanted a van for long range operations so, score. Went to Sturgis, among other places, quite a number of times in it and it made a better combination bedroom/bar/shop than a tent on the ground.

The model designation is actually also the GVW weight capacity as well. G-10's were a 1/2 ton load rated, G-20, a 3/4 T and G-30, the 1 ton.

If you had a GMC instead of the Chev, the models were G-15, G-25, and G-35, but the load ratings were the same.

After the mid 90's things got kind of murky and the vans got renamed Savanna(h) or something like that. They were already fitted with the Vortec motor by around 86 or so. Body-wise, apart from the cosmetic aspect of it all, the physical shape remained about the same until some time in the early to mid nineties.

Anyway, yeah, I think I can get you that measurement some time today, works for you????


So some time today proved to be more or less immediately.

For my van the wheel base is 125 inches, rear axle centre to front spindle centre, +/- maybe an inch. This was a do it myself alone exercise and the precision may be suspect.

For the front and rear, the measurement for wheel width, taken from the outside of the tire, to the outside of the tire,
is 79 inches at the front, and 79 inches at the back. Again, this is a plus measurement, meaning that it could be a little narrower but no wider. If i've erred, it is on the side of generosity. I'd rather go slightly wide and give you wiggle room than go tight and have the vehicle hang up or jam during loading. My rims apparently all possess the same offset; the back tread is wider but the width is to the inside and doesn't alter the overall track.


This what you needed??


Nick
 
Last edited:
  • Like
Reactions: ck80
Status
Not open for further replies.

GBodyForum is a participant in the Amazon Services LLC Associates Program, an affiliate advertising program designed to provide a means for sites to earn advertising fees by advertising and linking to amazon.com. Amazon, the Amazon logo, AmazonSupply, and the AmazonSupply logo are trademarks of Amazon.com, Inc. or its affiliates.

Please support GBodyForum Sponsors

Classic Truck Consoles Dixie Restoration Depot UMI Performance

Contact [email protected] for info on becoming a sponsor