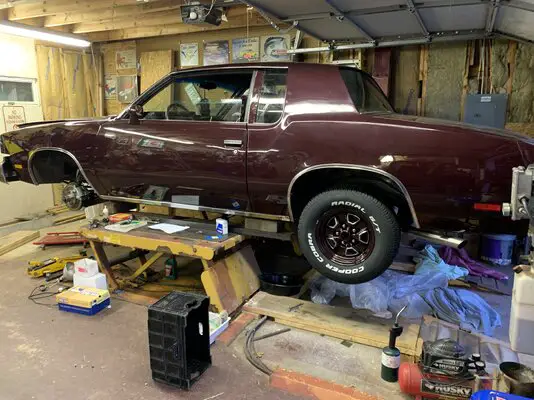
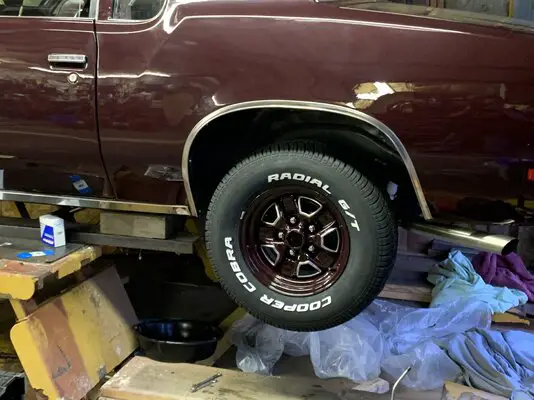
What did you do to your G-Body today 2024

Finished installing the driver’s door panel after breaking a window switch bezel. My old repair kept the pigtail from fitting in the door panel, and Pontiac switches have them upside down compared to literally every other car that used these connectors. 🫠
4B0AE84B-75F6-494F-AF8D-5988BDCD403F.jpeg


Just needs some carpet/fabric for the lowers.
 
Pulled the freshly repainted inner rocker panel off its stand and moved it over to the Monte to begin the process of installing it. During one of the previous test fits I had managed to locate it in a position with which I was satisfied so i had used a few self drilling Tek screws to create "hangers" to hold it where I wanted it. Today was just a case of using those same screws to again set the panel where it needed to be. Then I set the MIG up and...........................................................................


Ran out of C15 about half way through the burn in run.😳😬.

So tomorrow is "go get some gas" day" as well as a grocery run, cause Thursday is back in to work for the balance of the week.

At some point I also have to determine if my Optima Red Top is actually taking a charge or if it is now too old to resuscitate. I do have a fresh new battery waiting, jic. I did have to shake my head at the clerk at Napa, He swore that the new battery was fully charged and ready to go. Threw it at my Carlyle smart charger and it came up as 85%. it still seems that many clerks just haven't learned that so-called "fresh" or new batteries will actually lose charge at the rate of 1% per day, just sitting on the shelf. This one came with a build sticker for May of this year so, yeah, a new unit but still open and vulnerable to static loss while waiting for a buyer. They, of course, wanted a core, for some WTF reason so I scored one from the yard. I had actually hoped to find one in a fresh haul in but it seems that the tow boys are leaving the keys on or the doors open when they pick up vehicles so the batteries go flat. Supposedly you can get an AGM to return from the dead if you go way low with the charging amps. My smart charger can drop to 2A for charging small batteries so tried that first but the charger kept clocking out because the cpu could not sense any charge beginning to accumulate. Decided to try my Battery Tender Plus as it supplies current as the rate of 1.25A which might just be low enough that the Red Top can accept it. If so, it will either be about two days before I see anything positive, or the charing light goes green and into storage mode.

Did manage to score some more belts for my micro file sander so I can at least clean up the panel as far as it has been burned in. I had to plug in an in line water trap into it to grab the moisture in the compressor air as even with the large water trap at the tank, the air is so humid that I get moisture build up. It's a sufficient PITA that I have to drain the compressor daily and leave the drain valve open to let the tank "breathe".


Nick


Nick
 
Pulled the freshly repainted inner rocker panel off its stand and moved it over to the Monte to begin the process of installing it. During one of the previous test fits I had managed to locate it in a position with which I was satisfied so i had used a few self drilling Tek screws to create "hangers" to hold it where I wanted it. Today was just a case of using those same screws to again set the panel where it needed to be. Then I set the MIG up and...........................................................................


Ran out of C15 about half way through the burn in run.😳😬.

So tomorrow is "go get some gas" day" as well as a grocery run, cause Thursday is back in to work for the balance of the week.

At some point I also have to determine if my Optima Red Top is actually taking a charge or if it is now too old to resuscitate. I do have a fresh new battery waiting, jic. I did have to shake my head at the clerk at Napa, He swore that the new battery was fully charged and ready to go. Threw it at my Carlyle smart charger and it came up as 85%. it still seems that many clerks just haven't learned that so-called "fresh" or new batteries will actually lose charge at the rate of 1% per day, just sitting on the shelf. This one came with a build sticker for May of this year so, yeah, a new unit but still open and vulnerable to static loss while waiting for a buyer. They, of course, wanted a core, for some WTF reason so I scored one from the yard. I had actually hoped to find one in a fresh haul in but it seems that the tow boys are leaving the keys on or the doors open when they pick up vehicles so the batteries go flat. Supposedly you can get an AGM to return from the dead if you go way low with the charging amps. My smart charger can drop to 2A for charging small batteries so tried that first but the charger kept clocking out because the cpu could not sense any charge beginning to accumulate. Decided to try my Battery Tender Plus as it supplies current as the rate of 1.25A which might just be low enough that the Red Top can accept it. If so, it will either be about two days before I see anything positive, or the charing light goes green and into storage mode.

Did manage to score some more belts for my micro file sander so I can at least clean up the panel as far as it has been burned in. I had to plug in an in line water trap into it to grab the moisture in the compressor air as even with the large water trap at the tank, the air is so humid that I get moisture build up. It's a sufficient PITA that I have to drain the compressor daily and leave the drain valve open to let the tank "breathe".

Nick
this is correct, and you can possibly re-surrect a lead-acid the same way with the AGM charger. however, you also need to use an AGM battery charger. it does make a difference.
 
Wee-eell Plan A was to try to use the AGM capable charger that I had and see what was to be seen. What kept happening was that the charger would attempt to ship a charge out to the battery but after a few minutes. say ten or less, it would shut itself off. After about 4-6 tries to get it to stay the course, I concluded that even 2 Amps of input was too much for the AGM to accept, so........................... Unplugged the Carlyle and went to Plan B which was to sub in my Battery Tender Plus which has a charging rate of 1.25 Amps. Right now it has been doing its thing with the Red Top for a bit over 24 hours. The battery is not hot to the touch, barely warm in fact. The Tender Plus has a safety circuit in it but mostly what it does is to sit there and patiently push that small amp amount at the victim. I am not expecting any suddent miracle here; if it works it might be as much as three days to get the battery to come back from the dead, if at all. It does have a 7/16 sticker on it which is supposedly the date it was either constructed or first charged. That makes it 8 years old so well into middle age for a battery. Since it doesn't see much operating time and spends winters with the Tender attached to it to keep the juices flowing the reason might be as simple as the battery equivalent of old age senility.

For an immediate solution I hit the Napa shop and picked up a DT lead acid battery for just over 2 bills. It is a 900 CA dual terminal unit which means I can drop it into the S-10 in an emergency. New Optima Red Tops are going for 4 bills here and the american variant does not appear any cheaper. Plus most couriers won't carry a "live" battery due to paranoia about "battery go BOOM" syndrome.

Despite multiple statements of reassurance that the Napa item was completely charged, it wasn't. The Smart charger rated it at no more than 85%. So it got to get some electrical "Love" from the charger for a day and made it up to the low 90 percentiles. Dropped it in after lunch today and the Van fired right up. Volt meter shows a charge just over 14 at idle which is right where the needle ought to sit with no other draw except the engine and radio.


Did get back on the inner rocker panel and managed to get it completely burned in. Still have to do some finishing work on the welds before I throw a coat of Anti rust primer at it. Tomorrow is work so what I actually get done after work depends to a huge degree on the ongoing stupidity factor that I have to deal with as part of the day. That and the road squirrels in their plastic cages.


Nick
 
Got some stuff done today on the ‘80 but probably not going to make the Labor Day weekend drive I’d been hoping for. I mentioned I broke the shift shaft to the TH700R4 last week, I found a new GM one but it’s taking its time getting here. I tested out the TCC solenoid in the trans and it’s gone so I ordered a new AC Delco replacement. I’ll put that in tomorrow and then it’s just the shift shaft left before I can install the pan and refill the the fluid.

I got the rear of the trans dropped low enough to install a new shift cable. That was a little hairy as the car is on the lift and the driver side crossmember bolts were covered up. I finagled the lift to get access to the two bolts and got that done without too much fuss. I got the center console back in the car after cleaning, adding a new spring and polishing the chrome shifter.

I bled the rear wheel cylinders once more just to make sure there was no air in the lines and put the two rear tires on the car. No center caps or trim rings as it’s going for a front end alignment once it’s registered. No need to scratch the wheels more than necessary.


Also got the new universal joints installed and painted the driveshaft. Once the transmission is back together I’ll torque the rear end joint and wheel nuts.

Still have to drop the steering box and try adjusting it, Hutch explained it pretty well in one of his video so it should work out alright.


IMG_5710.jpegIMG_5711.jpeg
 
Last edited:
So, post work, instead of heading directly into the shop to do some more work on the inner rocker panel, I elected to sit down, relax, and have supper. A couple of hours later, I had amassed just enough new energy to head out to the shop and continue the process of dressing the welds and tacks that I had applied to the inner rocker panel to secure it to the flange that was all that remained of the old original panel.

On the way past, I stopped to take a fast peek at the AGM Battery and the Battery Tender Plus charger that I had hooked it up to about 2+ days ago and SURPRISE!!!! The charging light on the Tender was a solid, unwavering GREEN!!!! A fast check with the multimeter showed 12 Volts. What my fancy schmancy it charges everything special charger couldn't accomplish, my little black and green Tender Plus, with its charge rate of a mere 1.25 Amps, succeeded in accomplishing. And that is why i am a huge fan of them. The plan now is to leave it on the charger for another day to supersoak it's charge level and then use my Pile load tester to see if the cells have returned to the green range on the scale. After that it becomes my new battery for the Monte Carlo and saves me the hassle of shelling out for another new one of them. Side note to all this is that the face value or retail price for Optima AGM batteries is the same amount, whether in Canada or the US, the kicker, of course, is the exchange rate meaning that a 400 dollar battery in the US, might also be 400 dollars in Canada, but if I go to the US to buy my battery, the exchange is going to leave major bite marks in my financial A**.

More than slightly happier than when I first entered the shop, i proceeded to expend a couple of hours in systematically going over the work that I had done and identifying areas that needed extra or additional attention. Once I get the metal finished to where I am reasonably happy??? I will probably take a few pictures of the panel, then paint it. Then, time for the outer rocker panel.


Nick
 
DSCN4346.JPG


DSCN4349.JPG


Was in the garage for other reasons this AM while the temps were still cool and included some shots of my Battery Tender Plus as it took care of business. I did run a test on the battery on Friday after work using my battery load tester. Unloaded, the needle on the meter swung deep into the green zone; two second load check and the needle came back but still stayed green. Put the battery back on the tender and within an hour the tender was advising me that the battery was over 80% charged and this morning the green all done light was glowing well, green,


DSCN4347.JPG


The backflash from the camera strobe tends to wash out a lot of detail sometimes but if you look closely the little green light has a twinkle in its eye. FYI, this is NOT a promo for Battery Tender, but it is one way out of many offered that might prove useful or beneficial to someone on the board who is having to deal with an AGM that has gone flat.

Oh, yeah, the next assignment for the AGM is going to be the resident battery in my Monte. For now it is quietly sitting on a section of 8x8 baulking; I'll let it lie for a couple of weeks and then test it again to see if it is holding its fresh new charge or not.


Nick
 
About time again for some progress shots, so..............


DSCN4338.JPG


DSCN4340.JPG


At this point the new inner rocker panel is more or less completely and securely attached to the flange that used to be the old rocker panel. Post surgery and editing out of the dead metal and general nastiness, what I was left with was an 1-1/2 or so wide strip of old rocker panel that was still structurally sound and serviceable. This strip, or flange, became my jumping off point to which I attached the replacement section of panel once I had measured thrice and cut once to get it the right? width. Pictures of the new panel were posted somewhere above and earlier so viewers may have some idea of the number of mounting holes that I had punched in the panel to be turned into rosette welds. A last minute change in plans led me to add a second row that I staggered to fall parallel but offset to the first; think zig-zag stitch here.


DSCN4343.JPG


DSCN4344.JPG


Since most of you have seen shots of metal being sanded, and ground, and smoothed and tweaked, I think I am just going to skip that part and head directly to the shots of the paint drying; in this case the antirust primer. The inner panel received multiple heavy coats of the primer simply because this is the last time (I hope..........🤣) that it will ever see the light of day again. The only thing I can do to prolong its life as far as possible is to slather on the paint and make sure i get it into all the cracks and crevi that I can identify.


DSCN4345.JPG


The quarter panel cavity. The paint is about dry and just about ready to be topcoated with the same semi-gloss black that I used on the frame rail. Multiple coats will be the order of the day for that as well.


DSCN4353.JPG


The new outer rocker panel, resplendent in its own coats of paint; an undercoat of the antirust black and the matching top coat of the semigloss black, The ambient light and flash between them are just about bright enough that you can see it sheen of the black. Not shiny or glossy, just not flat. it gets clamped into position sometime tomorrow (Sunday) and then comes the tedious task of filling in all those holes that I punched along both edges of the panel.

Once it is in place, I still will have to replace the front and rear pillar sections that I had to dissect out and either set aside or replace, according to location. Once all this is done, then the project goes back on hold as the S-10 has to come in for brake work and some serious attention to a major acne breakout on the box panels.


Nick
 
This should be called "what I tried to do to my G-Body...."

I woke up with high hopes. "I'm going to change my upper and lower control arms today," I told myself. Regular folks said it should take 3 hours, so I said for me, maybe 5 hours.

Years of an oil leak out of the valve covers and a power steering box leak made even the simplest of tasks much more difficult, but I prevailed. I finally got the upper ball joint separated from the spindle only to find out that someone welded the control arm bolt to the mount? Huh? Why? My coworkers told me to get a die grinder or a "finger" belt sander and try to get it off. I'm a standstill for now. I'm going to buy one of those cheap kid pools from a Dollar Store and start scraping some of the gook off of the front underbody. I took some WD40 and sprayed it on the frame rail behind the LF tire and it clunked off.

1724678256053.png


1724678223457.png
 
Last edited:
This should be called "what I tried to do to my G-Body...."

I woke up with high hopes. "I'm going to change my upper and lower control arms today," I told myself. Regular folks said it should take 3 hours, so I said for me, maybe 5 hours.

Years of an oil leak out of the valve covers and a power steering box leak made even the simplest of tasks much more difficult, but I prevailed. I finally got the upper ball joint separated from the spindle only to find out that someone welded the control arm bolt to the mount? Huh? Why? My coworkers told me to get a die grinder or a "finger" belt sander and try to get it off. I'm a standstill for now. I'm going to buy one of those cheap kid pools from a Dollar Store and start scraping some of the gook off of the front underbody. I took some WD40 and sprayed it on the frame rail behind the LF tire and it clunked off.

View attachment 244590

View attachment 244589
Ah. my own personal go to tool for tight spots like that would be my Dremel motor with either a cut off wheel in it or a grinding wheel as alternative. They are inexpensive enough that you can hit the Home Depot and score one for reasonable $$$$. Buy a 5 pack of the cut off wheels and be prepared to break a couple; the steel centres pop free if stressed too heavily. along with the quick change mandrel that they mount to. You should have enough perimeter space around the bolt to get to that tack without injuring the bracket. You could also try using one of the stone grinding tip wheels if the space is too tight for the cut off wheel. If all else fails and you have the space, you could go caveman and try to cut the tack with a chisel and hammer. Use a pair of vice grips to hold the chisel, keeps your fingers away from the hammer and out of harm's way.


Nick
 

GBodyForum is a participant in the Amazon Services LLC Associates Program, an affiliate advertising program designed to provide a means for sites to earn advertising fees by advertising and linking to amazon.com. Amazon, the Amazon logo, AmazonSupply, and the AmazonSupply logo are trademarks of Amazon.com, Inc. or its affiliates.

Please support GBodyForum Sponsors

Classic Truck Consoles Dixie Restoration Depot UMI Performance

Contact [email protected] for info on becoming a sponsor