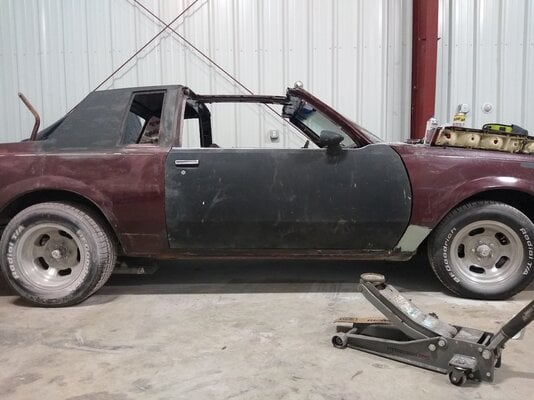
What Did You Do To Your G-Body Today? [2021]

Status
Not open for further replies.
Wired a single positive cable from the battery post to the installed posts on the fender. Came off a C1500 truck. Ran the electric fan relay, under hood lights, and heavy duty harness for the window relays to the posts and all work as intentioned.
EBA42F57-FF07-4397-B077-A410B30BB6C0.jpeg

I plan to run another one right next to it for grounds instead of having all those grounds on one bolt.
Also finished installing a new water pump and putting all the accessories back on. Cleaned up would I could of the spray of rusty water that the old pump put out. Just need the new thermostat and housing from RockAuto and I’ll be done.
 
Feel like the McKenzie Brothers here; "Hello, today is Day?? of the 12 Days of my Brake Job", with appropriate background music and plenty of bacon and maple syrup washed down with a stein of beer.

So today, I got into the shop early; had visitors wanting to see a furnace that I have been wanting to sell as surplus. Took the opportunity to add some more paint to the first new brake drum and went back into the house for breakfast (Toast and Bacon, no syrup, no beer. Bother)

Returned to the shop and went to install the new drum and, uh-uh, no joy. Wanted to index in but.... Off came the drum and out came the work light. Bright light exposed the culprit, my old enemies crap and crud had built up a layer of sediment on the flange shoulder of the axle that had grown thick enough that the new tighter drum could not ease past it. Now where's my trusty Dremel tool?? Used a wire brush to scrub away the light and loose material and then went at it with a micro-flap wheel mounted to the Dremel. That took all the concretation off and got me back to bare metal. Quick test fit and badda-boom, in business. Slather a minimal coat of Never-seize on the shoulder as a rust deterrent and back on goes the drum. it will have to come off once more when I get to the part about adjusting the shoes but that comes later. On to the passenger side again.

Started by applying paint to the drum's perimeter flange as it get pelted by all the crap coming off the road. Left that to dry and moved on to the backing plate. Stuffed the new e-brake cable into its mounting hole. Back to the parts layout and decided to clean off the shoe frame mounting pins, you, know, those two skinny pins that come in from behind and have those two miserable springs hung on them that take so much sturm und drang to get to rotate into position? Yeah, those two.. Anyway, one cleaned up okay with a little sandpaper and a flash coat of black but pin two, the one for the trailing shoe, well that was another story. BENT. Could straighten it maybe but decided to give lads a call and see if the pins are offered as a solo part number. Come to find out that, Yes, they are actually offered as complete set of four. Boom, three bags full coming in for Tuesday. Distributor is not open for orders on Saturday, order goes in on Monday and mine on Tuesday.

And with that, the lights went out, the hands got washed, and I called it done for the day. The pace is slow but about what my bones and body is capable of tolerating right now so it works for me.


Nick
 
  • Like
Reactions: MalibuDavyou5
Hooked the battery up, started the ol girl up, moved crap around the garage in order to move the car to the other side. While I was backing it out, I said WTH, why not and took it for a spin down the road and back. Mind you it was 20° out today and the snowmobiles were out in force. Figured it would be the last voyage for the SBC since the 6.0L is ready to be dropped in.😁
 
Ended up buying new calipers for the rear, I couldn’t rig up a return spring on the old ones and one was really stiff to get back to its resting position. And after that I learned I royally messed up.
I made the new driver’s side cable out of the Mustang one, but made the sheath 2 inches longer, that’s not the way to do this. With the cable set in place, and the passenger side cable lengthened to its full length - Im using shaft collars with set screws to control overall cable length - the adjuster was 3/4 of an inch from even going into the hole on the equalizer, let alone through it enough to get a nut on it.
So now I have to get another cable made up.
View attachment 167764
I’m going on record and state that half of this post is inaccurate. The length of the sheath was correct, but the overall cable length wasn’t. This was due to me forgetting to attach the pedal assembly to the cable 🤪 which takes up about 3 inches of cable at in the released position. Even with the stock G body driver’s side cable being 72 inches long, it’s too short for the axle/brake swap. A 1998 Crown Victoria cable works exceptionally well, the sheath length is correct, and there’s a ton of cable length to get the adjustments dialed in.
That being said- I discovered after 4 hours of flapping about that the passenger side caliper I bought is junk, the parking brake actuator is either broken or wore plumb out. Either way, piston no move. Going to go get this one exchanged shortly.
 
Feel like the McKenzie Brothers here; "Hello, today is Day?? of the 12 Days of my Brake Job", with appropriate background music and plenty of bacon and maple syrup washed down with a stein of beer.

So today, I got into the shop early; had visitors wanting to see a furnace that I have been wanting to sell as surplus. Took the opportunity to add some more paint to the first new brake drum and went back into the house for breakfast (Toast and Bacon, no syrup, no beer. Bother)

Returned to the shop and went to install the new drum and, uh-uh, no joy. Wanted to index in but.... Off came the drum and out came the work light. Bright light exposed the culprit, my old enemies crap and crud had built up a layer of sediment on the flange shoulder of the axle that had grown thick enough that the new tighter drum could not ease past it. Now where's my trusty Dremel tool?? Used a wire brush to scrub away the light and loose material and then went at it with a micro-flap wheel mounted to the Dremel. That took all the concretation off and got me back to bare metal. Quick test fit and badda-boom, in business. Slather a minimal coat of Never-seize on the shoulder as a rust deterrent and back on goes the drum. it will have to come off once more when I get to the part about adjusting the shoes but that comes later. On to the passenger side again.

Started by applying paint to the drum's perimeter flange as it get pelted by all the crap coming off the road. Left that to dry and moved on to the backing plate. Stuffed the new e-brake cable into its mounting hole. Back to the parts layout and decided to clean off the shoe frame mounting pins, you, know, those two skinny pins that come in from behind and have those two miserable springs hung on them that take so much sturm und drang to get to rotate into position? Yeah, those two.. Anyway, one cleaned up okay with a little sandpaper and a flash coat of black but pin two, the one for the trailing shoe, well that was another story. BENT. Could straighten it maybe but decided to give lads a call and see if the pins are offered as a solo part number. Come to find out that, Yes, they are actually offered as complete set of four. Boom, three bags full coming in for Tuesday. Distributor is not open for orders on Saturday, order goes in on Monday and mine on Tuesday.

And with that, the lights went out, the hands got washed, and I called it done for the day. The pace is slow but about what my bones and body is capable of tolerating right now so it works for me.


Nick
The great white north theme is my ringtone
 
  • Like
Reactions: MalibuDavyou5
Status
Not open for further replies.

GBodyForum is a participant in the Amazon Services LLC Associates Program, an affiliate advertising program designed to provide a means for sites to earn advertising fees by advertising and linking to amazon.com. Amazon, the Amazon logo, AmazonSupply, and the AmazonSupply logo are trademarks of Amazon.com, Inc. or its affiliates.

Please support GBodyForum Sponsors

Classic Truck Consoles Dixie Restoration Depot UMI Performance

Contact [email protected] for info on becoming a sponsor