What Did You Do To Your G-Body Today? [2021]

Status
Not open for further replies.

ttype

Greasemonkey
Jan 30, 2017
239
223
43
Brockville, Ontario.
I kinda installed a section of floor pan today... there is still a lot to do yet but it is a start.

5401's are on the way too(can't wait)...Then it's the new fuel tank, pump and upgraded handheld controller (efi)
 

Attachments

  • 16260503821245106573889282328758.jpg
    16260503821245106573889282328758.jpg
    1.9 MB · Views: 79
  • 20210711_203314.jpg
    20210711_203314.jpg
    1.9 MB · Views: 84
  • Like
Reactions: 7 users

ttype

Greasemonkey
Jan 30, 2017
239
223
43
Brockville, Ontario.
There will be a bit of clearancing to do for the passenger side exhaust pipe, a given. 1/4" flatbar made for a quasi driveshaft loop the last time there was quality time spent under this car... however... i made yet need an adjustment or two before i really haull on it. It certainly makes customizing fun as compared to customizing a new hemi truck wit some magnaflows and bolt ons...
 

Attachments

  • 16260508811685123939623748823954.jpg
    16260508811685123939623748823954.jpg
    1.3 MB · Views: 85
  • 16260509591156899264790640375985.jpg
    16260509591156899264790640375985.jpg
    1,018.6 KB · Views: 82
  • Like
Reactions: 2 users

ttype

Greasemonkey
Jan 30, 2017
239
223
43
Brockville, Ontario.
That little floor brace turned safety loop(quasi) was not exactly an easy fit, however it is the most important alignment piece when putting in new floor pieces.

This is the new and improved baby monster going in... 383 with a whole new rotator to replace the first one i tried... 'cept this time with a complete kit from reputable dudes. Gonna run it with an open plenum streetmaster this time.

I also read the instructions for the new handheld today.

Peace out and keep busy folkies.

R.
 

Attachments

  • 16260515355574286402649871798402.jpg
    16260515355574286402649871798402.jpg
    1.2 MB · Views: 79
  • Like
Reactions: 4 users

ttype

Greasemonkey
Jan 30, 2017
239
223
43
Brockville, Ontario.
Installed new valve cover gaskets and exhaust manifold gaskets. Blew out the old exhaust gasket, I'll attach a picture. Have not blown one out quite like that before.

Absolutely hate the lack of space to get the backside number 8 header bolt. It's barely snug.. I can't get any leverage. The LS swap cannot happen soon enough.

Been parked for 2 weeks. After I got done replacing all of that today, the battery was completely dead... So it's currently on the charger. We shall see how she sounds when she fires up... View attachment 179551
I bought one of these during a roadtrip for the exact same reason. Out in the monte for honeymoon dropping the inlaws off at Comox airport, then the tickety tick tick got worse... Lordco has pretty nice tool selections. The sparkpug in that hole is a pain too with old heads that require washered plugs.

R.
 

Attachments

  • 16260534394982561712751181177308.jpg
    16260534394982561712751181177308.jpg
    914 KB · Views: 77
  • Like
Reactions: 1 users

ck80

Moderator
Moderator
Supporting Member
Feb 18, 2014
5,758
9,171
113
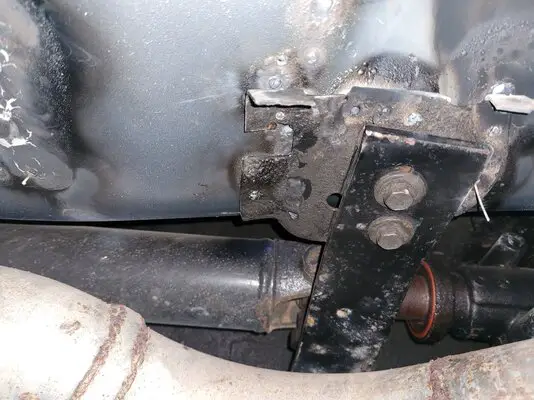
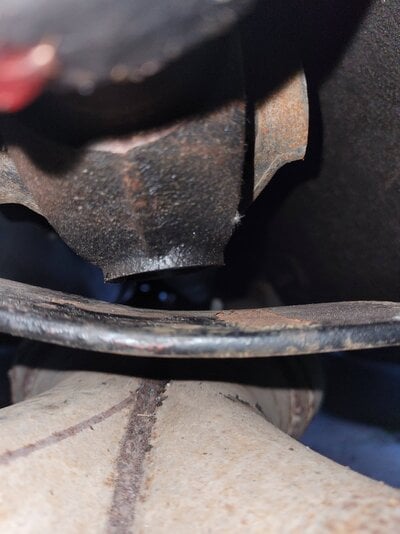
But... Because that bolt can't be tightened down, it's still leaking. With the hood shut I can't hear it, but I know it's there. Took it on a rip around the block, she is okay. Guess the motivation to get this LS going now has another reason... Lack of exhaust leaks. This SBC was in the car when I bought it, who the hell knows what these headers went to, but they work aside from the fact of being unable to get to places on them. One of the spark plugs boots has seen better days, but it's because it's trapped between the head and the #4&#6 primaries. Can't even get the #6 plug out with the headers on.

Can't wait to yank all of this crap apart and out and get it all cleaned up so I can do a swap the correct way and not hacked together like this one was. I fixed alot of issues along the way but without pulling it all out to correct some things, it's not worth it since the LS is already on the stand, just needs pulled down, gone through, reassembled and then put into the car. But with the LS swap comes alot of other necessary upgrades. (fuel, electrical, etc)
Only has to work well enough for now to lay major rubber on your last day of work..
We've covered that part of things...
 
  • Like
Reactions: 2 users

oldsmobile joe

Royal Smart Person
Nov 12, 2015
2,067
3,055
113
mpls
Took the black corvette seats out of my brown cutlass and stuck them in the G wagon
20210711_202334.jpg

Then put "new to me" brown corvette seats in brown cutlass.
20210711_202212.jpg
 
  • Like
Reactions: 10 users

oldsmobile joe

Royal Smart Person
Nov 12, 2015
2,067
3,055
113
mpls
Also finally wired up the power rear seat vent windows. Now i just gotta get the power front windows in along with the power locks. while working on the back doors, i replaced the rotted out window belt line weather seals. the ones at the base of the window.
Baby steps
 

Attachments

  • 20210711_205658.jpg
    20210711_205658.jpg
    393.9 KB · Views: 73
Last edited:
  • Like
Reactions: 2 users

Rktpwrd

Builder of Cool Shjt
Supporting Member
Feb 2, 2015
4,198
24,145
113
Calgary, Alberta, Canada
Finally got the AstroRoof in Olds Cool back together enough to fit and seal, then put the entire interior back in minus the headliner.

Still not real happy with the way it’s fitting and working, but it’ll do for the rest of the summer and in particular this week when the missus and I take it on holidays. Hence my not reinstalling the headliner yet.

Anyways, once that was done, took it out for a nice long 3 1/2 hour cruise all over the city to burn off the 3 month old stale dino juice, and on the way home left a certain young lad in a yellow supercharged Cobalt SS with some very hard feelings. He actually hung with me pretty good, but I think his feelers got injured when he couldn’t duplicate the epic burnout I did for him at the intersection afterwards.

Poor guy, getting spanked by a “grandpa Oldsmobile”.
😅😅😅
 
  • Like
  • Winner
Reactions: 11 users

D123gt

Not-quite-so-new-guy
Jun 22, 2021
38
25
18
The cruiser got a new set of shocks and found out I need new front springs. Looks like they have been cut and they have the old rubber spacers in between the coils.
 
  • Like
Reactions: 2 users

scoti

Royal Smart Person
Sep 5, 2019
2,007
3,464
113
Texas
Back out there messing w/the front tub mods.

Had issues w/the driver side tub not fitting on the car like it did when I had just the front clip & core support mocked-up. I initially suspected the aftermarket driver side fender & required cuts were the reason as things @ the lower front mount/flange were more flimsy vs the legit OE/GM fender w/similar cuts on the pass side (poor quality spot welds @ that front seam). Over the extended July 4th weekend I welded up the flange areas I could for the driver side fender to solidify that area. I reinstalled the tub on the fender & despite it being more rigid it still didn't want to sit square.

I kept staring @ it & that's when I noted the distance of the 2 factory inner firewall tub mount brackets were in different locations (the driver side was ~2" closer to the outer fender vs the pass side dimensions). This past weekend I got out there & removed that inner driver side bracket/stand-off. This made a definite improvement. Now the only thing making contact was the lower inside corner of the wiring harness bulkhead. While I was cleaning up the firewall from the removal of the bracket, I buzzed the lower corner of the wiring bulkhead.

Now the driver side tub easily installs & sits square like it did during mock-up off the car. With this resolved, I'll be installing the new core support mounting hardware & attempt to align the fender better. I still need door hinge rebuild kits to make sure the doors fit better than they were since things were @ that stage of wear. Once the fender, core support, & door alignment is solidified, I'll start finishing out the tub mounting tabs/flange.
 

Attachments

  • 20210711_141324.jpg
    20210711_141324.jpg
    1 MB · Views: 78
  • 20210711_141332.jpg
    20210711_141332.jpg
    39.3 KB · Views: 72
  • 20210711_141458.jpg
    20210711_141458.jpg
    45.5 KB · Views: 78
  • 20210711_141507.jpg
    20210711_141507.jpg
    37.8 KB · Views: 78
Last edited:
  • Like
Reactions: 3 users
Status
Not open for further replies.

GBodyForum is a participant in the Amazon Services LLC Associates Program, an affiliate advertising program designed to provide a means for sites to earn advertising fees by advertising and linking to amazon.com. Amazon, the Amazon logo, AmazonSupply, and the AmazonSupply logo are trademarks of Amazon.com, Inc. or its affiliates.

Please support GBodyForum Sponsors

Classic Truck Consoles Dixie Restoration Depot UMI Performance

Contact [email protected] for info on becoming a sponsor