What Did You Do To Your G-Body Today? [2022]

Status
Not open for further replies.
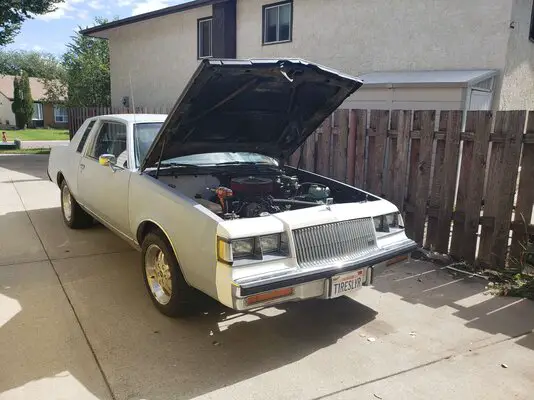
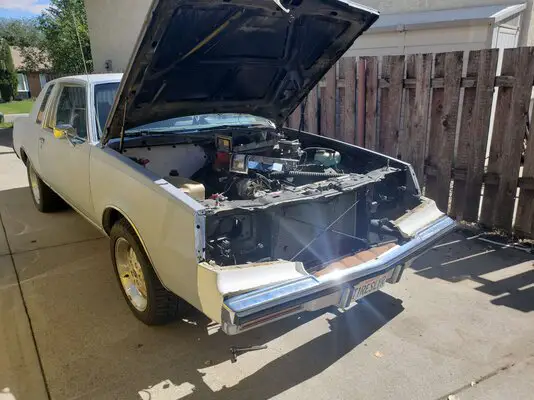
On a lazy Saturday, all I did was replace a low beam headlight that burnt out last week, added a tiny bit of some anti-freeze, and 2 new hex bolts that were rusting out by the battery holder.
Getting ready to go to a retirement dinner tonight, for a good friend and co-worker that retires this coming Friday after 25 years of service. I am jealous as I am contemplating June of 2023 but I sincerely wish him the very best, he has truly earned it ! I always wonder why the good people leave and the crap stirs never do ? 😵
 
Today was as good a day as any to execute "Rotation Day", this being the day designated to drop my Monte back down onto its dollies and physically turn the complete car 180 degrees so that the passenger's side is now exposed to the world.


DSCN3388.JPG


DSCN3390.JPG


DSCN3389.JPG


So, peeking out from under its cover is the passenger side of Project Regress, my 85 SS Monte Carlo. The plan for this side is to reskin this door like I did to the driver's side, plus cut away the inner and outer rocker panels from the A Pillar to back underneath the front lower quarter panel and replace them. Along the way I still have to rehang the post muffler exhaust dumps and reconnect the parking brake cable, as well as replumb the fuel lines; all of which will be easier to accomplish with this side open and accessible. The refrigerator white paint is bogus, a cheap cover coat done sometime ago by a previous owner for ??? reason that is slowly going to get sanded away and replaced by the same hue of red that I chose for the driver's inner door skin (See shots posted ago)


DSCN3382.JPG


DSCN3385.JPG


These first two shots are of the exhaust dumps post cleaning and polishing. They are really nothing special, just a combination of bends that I welded together in the old days to get the exhaust over the axle tubes and down the road. For the purists who believe that the exhaust ought to more properly exit at the back from under the bumper, all of the frame damage aft of the differential was due to rust that was caused by condensation that that the heat from the pipes induced to occur inside the frame horns. These, although by no means politically correct, exit out just behind the rear wheels and I LIKE THEM.


DSCN3386.JPG


And just a shot of the tools of rust intended genocide. My little step ladder, which really helps when I go to stack the sections of cribbing back on their dolly, also makes a great portable shelf, and a good pair of second hands for when you are trying to wrestle with a drive shaft. The tote boxes beside the ladder are also stacked on a furniture dolly and held in place with ratchet straps. i can stack three or four of these service boxes vertically and just labelled them using a white marker for metal in order to designate what they have inside. The open one is, obviously, for my 4.5 mini grinders and holds two of them plus wheels and tools in the tray. Only bummer is that these were a Napa part and they are no longer offered at the branch.


Nick
 
Two months in, cruise control still works. I definitely need new speedo cables or something, even minor bumps in the road will make the needle bounce and rapidly decrease cruise speed. It's directly dependent on needle position.
 
Two months in, cruise control still works. I definitely need new speedo cables or something, even minor bumps in the road will make the needle bounce and rapidly decrease cruise speed. It's directly dependent on needle position.
You pull out just the cable and see if there is a burr on the inner section or if the plastic end is bad? If it’s ok you can grease it and reinstall. Sounds more like the sensor under the dash or the speedometer itself though. There’s a small (usually) light blue speed sensor I believe that you can check.
 
  • Like
Reactions: MrSony
You pull out just the cable and see if there is a burr on the inner section or if the plastic end is bad? If it’s ok you can grease it and reinstall. Sounds more like the sensor under the dash or the speedometer itself though. There’s a small (usually) light blue speed sensor I believe that you can check.
It doesn't always do it and living the cable definitely helps it. You can literally feel and see the pedal pulsing in time with the needle moving.
 
It doesn't always do it and living the cable definitely helps it. You can literally feel and see the pedal pulsing in time with the needle moving.
It almost sounds more electrical. Where you loose speed. You have wiring down the column and the “blue “ speed controller. Not sure if I have one at the house to get a picture of it. The fact you hitting a bump almost sounds like a grounding or connecting thing. Not sure if anyone here knows if you can run a test on the parts. You can look and see is there is a thread already on it here.
 
Had been meaning to get up onto the mezzanine deck to locate and retrieve the radiator for my Monte that I had stashed up there for safety. This, of course, re-brought up the small matter of how to get up there safely. The few times that I have ventured up into those spaces, I have used a tall step ladder and the getting there was fairly uneventful. Getting back onto the ladder from the upper floor, weell that was a different story. I had toyed with creating and installing a safety chain but how to attach the chain to the ladder without damaging or compromising the structural integrity of the ladder was always an issue.

My solution was to sister a second floor stud to the perimeter stud for the mezzanine floor. This gave me the equivalent of a 4x4 to anchor into. Then I took a pair of long eyebolts that I had salvaged from another project and added some washers and heavy hex nuts, through drilled the doubler, and ran the eyes in and nutted them into place. Part One complete.

For Part Two I finally was able to score some heavy 1/4" chain and some chain links along with a spring loaded safety hook. The chain got attached to the eyebolt on one side using a chain link and then wrapped around the legs of the ladder so as to keep the rungs of the ladder open and trip free. Used another chain link to attach the safety hook to the chain; and I had my safety chain completed. Made a test trip up the ladder to locate the radiator, moved a few things around to refresh my memory of what is up there, and then came back down.

The only adjustment I made to my device was to clip the excess length of chain off and put it back in the box. When not in use the chain gets swung away and wrapped around one of the joists.

Took another run at refurbishing the post muffer exhaust dumps but almost even before I finish wheeling off the rust, the dust starts to form again. The humidity and the depth of the resident cancer pretty much guarantee that I would have to grind the tubes to about paper thickness
to get totally rust free material. Going to have a chat with my local Napa dude and see if they can expand a length of 2.25 to 2.50 for about 4 inches of pipe length, and do it at both ends so when i cut the tube in half I get the two sections I need to recreate the ends. Not a high priority project but worth doing while Bay One is open and accessible.

The next part of this will be to dig out the sheet metal scoop for the rad that fits down and in front of the bumper. It still requires some body hammer love to straighten out some of the corners so having the front end out in the open like it now is will make that easier.


Nick
 
Last edited:
  • Like
Reactions: Ugly1 and Texas82GP
Hogged out some holes.
On the throttle bracketry and cable eyelet. Was holding the carb open by ~150 rpm. Bugged me.
 
Status
Not open for further replies.

GBodyForum is a participant in the Amazon Services LLC Associates Program, an affiliate advertising program designed to provide a means for sites to earn advertising fees by advertising and linking to amazon.com. Amazon, the Amazon logo, AmazonSupply, and the AmazonSupply logo are trademarks of Amazon.com, Inc. or its affiliates.

Please support GBodyForum Sponsors

Classic Truck Consoles Dixie Restoration Depot UMI Performance

Contact [email protected] for info on becoming a sponsor