Did some more re-arranging of the floor to gain a little more room and, after some additional thought, elected to pull the window glass out of its cradles and stash it somewhere safe?? to gain some more working space inside the shell; also parked the tracks for it.
Was just looking at the motor assembly and happened to notice that that big old spring that normally sits on a large pin at the intersection of the two lever arms was missing. Since the last time I dealt with an electric window drive was multiple decades ago and, at the time, I suffered a broken finger from the arms snapping closed during the dissassembly process.
(Lucky it didn't completely amputate the finger. Actually thought it had only been severely bruised at the time so there I was, with the finger under cold water, trying to freeze the finger to stop/reduce the swelling and it still isn't working right! Trip to the Emerg and the doc says he can't set it unless he freezes it. Told him to pull harder, he wasn't happy, jammed the needles into me anyway. Six weeks without two fingers cause he used the next door neighbour as part of the splint. Couldn't pull a clutch lever and working on the 78 became a PITA Anyway)
What my memory is not recalling for me is whether or not the motor drive window mechanisms needed that spring or if it was just meant for the hand driven crank the window up manually version?
Went looking for pictures but about that kept appearing was tape drive stuff and that is way too new for what I am working with. Might have a spare assembly lurking around in one of the totes but figured it might be easier to inquire before going through the exercise of unearthing them and rooting through the contents.
Did get a good look in at the old bottom sill/flange replacement and it actually would have worked without any additional visits from the welder. At the time it was both plug and seam welded in place because My Lincoln 180 was set up for outside work and flux core is/was not up to the task of doing a butt weld involving metal 19/20 gauge in that kind of environment. I just couldn't dial it down that cold.
So with the sill pocket now wide open to invasion, I can strip all the old remaining surface rust out, get down to clean metal, recut or dress down the old edges, and then finish the inside seam edge. I am not going to cut away the replacement sill; too much work for too little gain. It looks to be simpler just to knock down the previous welds and get them smooth and then move on to rust mort and primer sealer.
Pictures?? maybe later this week once I make some more progress and get a better feel for how much more surgery will be needed to deal with that mia leading edge. Right now it looks to be a total cut away, no rehab possible.
So, anyone happen to have a picture or two of an 81-88 Monte Carlo SS driver's side window motor assembly complete with the sector gear and arms that I can take a peek at??
Nick
What Did You Do To Your G-Body Today? [2021]
- Thread starter CopperNick
- Start date
You are using an out of date browser. It may not display this or other websites correctly.
You should upgrade or use an alternative browser.
You should upgrade or use an alternative browser.
- Status
- Not open for further replies.
My door is exposed on the inside, still need pixDid some more re-arranging of the floor to gain a little more room and, after some additional thought, elected to pull the window glass out of its cradles and stash it somewhere safe?? to gain some more working space inside the shell; also parked the tracks for it.
Was just looking at the motor assembly and happened to notice that that big old spring that normally sits on a large pin at the intersection of the two lever arms was missing. Since the last time I dealt with an electric window drive was multiple decades ago and, at the time, I suffered a broken finger from the arms snapping closed during the dissassembly process.
(Lucky it didn't completely amputate the finger. Actually thought it had only been severely bruised at the time so there I was, with the finger under cold water, trying to freeze the finger to stop/reduce the swelling and it still isn't working right! Trip to the Emerg and the doc says he can't set it unless he freezes it. Told him to pull harder, he wasn't happy, jammed the needles into me anyway. Six weeks without two fingers cause he used the next door neighbour as part of the splint. Couldn't pull a clutch lever and working on the 78 became a PITA Anyway)
What my memory is not recalling for me is whether or not the motor drive window mechanisms needed that spring or if it was just meant for the hand driven crank the window up manually version?
Went looking for pictures but about that kept appearing was tape drive stuff and that is way too new for what I am working with. Might have a spare assembly lurking around in one of the totes but figured it might be easier to inquire before going through the exercise of unearthing them and rooting through the contents.
Did get a good look in at the old bottom sill/flange replacement and it actually would have worked without any additional visits from the welder. At the time it was both plug and seam welded in place because My Lincoln 180 was set up for outside work and flux core is/was not up to the task of doing a butt weld involving metal 19/20 gauge in that kind of environment. I just couldn't dial it down that cold.
So with the sill pocket now wide open to invasion, I can strip all the old remaining surface rust out, get down to clean metal, recut or dress down the old edges, and then finish the inside seam edge. I am not going to cut away the replacement sill; too much work for too little gain. It looks to be simpler just to knock down the previous welds and get them smooth and then move on to rust mort and primer sealer.
Pictures?? maybe later this week once I make some more progress and get a better feel for how much more surgery will be needed to deal with that mia leading edge. Right now it looks to be a total cut away, no rehab possible.
So, anyone happen to have a picture or two of an 81-88 Monte Carlo SS driver's side window motor assembly complete with the sector gear and arms that I can take a peek at??
Nick
Opened up the hood and started checking it out from the last time I peeped in. Pulled out the old distributor and set time and dropped another in, the older one was tight and took a minute to loosen it up and remove. I also re wired the plug wires and then removed the valve covers to see the inside. eeegh it's bad just as I thought the head gaskets had blown so I ordered a gasket kit and now the fun of waiting for it to arrive lol. But now its time to pull her out start disassembly and clean up. Will try to get it out before it snows.....hopefully
Put any sharp objects, knives, scissors hatchets and razor blades away in a drawer, lock it, and throw away the key! The key to wiring harnesses is to detach each and every connection at its terminal wherever possible and use masking tape and a sharpie to write down what the wire does. Even though this motor is headed for another car, knowing what the various sending units and sensors do and how they were wired into the harness is valuable and useful. You may still end up having to swap various sensors from your old motor to the new one just so they will fit the plugs. Swapping the plugs themselves is a Class Z PITA, to the point where a supply of foam rubber bricks is handy for when you just have to throw something. Wives have been known to throw their hands over the ears of their children and run away to their mothers to avoid hearing the frustrated screaming that accompanies a wiring job. LOL.
Nick
Nick
Last edited:
Nothing. Decided that my lungs needed another day off from the crap and corruption generated by welding and grinding.
Installed LED cluster bulbs...win
Installed NOS speedo cable...nada
I don't get it. I have never had problems with a cable-driven speedo other than melting one, but this car just will not work. Tested everything, all is good, cable spins, speedo spins and indicates, (I know the driven gear works because the speedo worked for about 3 miles when I first put the car on the road) put it all together using the OE routing...nada. I removed the clamp at the crossmember, maybe that will help. Tired of messing with it today, so it's a tomorrow job.
I guess if tomorrow doesn't bring joy it's going to be time to look into electric, although no one else drives it, and I can use the tach to gauge speed...at least in 3rd I can
I'll ask this, did you lube the cable before installing it?Installed LED cluster bulbs...win
Installed NOS speedo cable...nada
I don't get it. I have never had problems with a cable-driven speedo other than melting one, but this car just will not work. Tested everything, all is good, cable spins, speedo spins and indicates, (I know the driven gear works because the speedo worked for about 3 miles when I first put the car on the road) put it all together using the OE routing...nada. I removed the clamp at the crossmember, maybe that will help. Tired of messing with it today, so it's a tomorrow job.
I guess if tomorrow doesn't bring joy it's going to be time to look into electric, although no one else drives it, and I can use the tach to gauge speed...at least in 3rd I can
I did not, per the GM packagingI'll ask this, did you lube the cable before installing it?
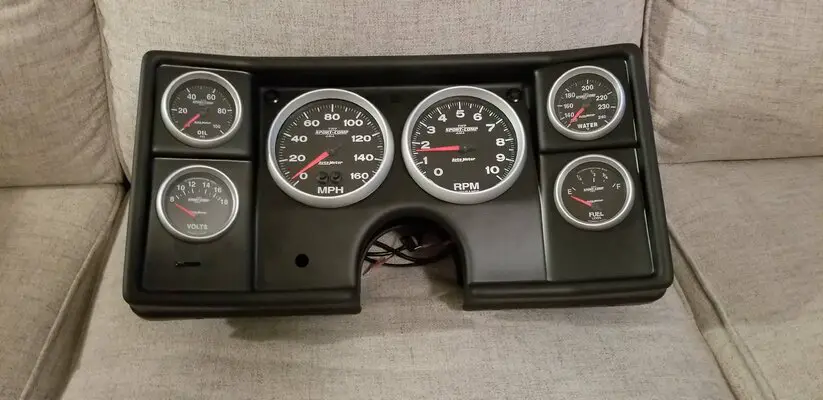
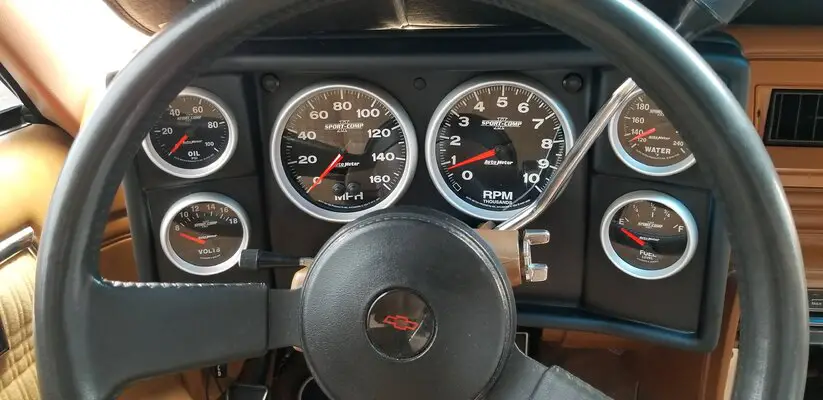
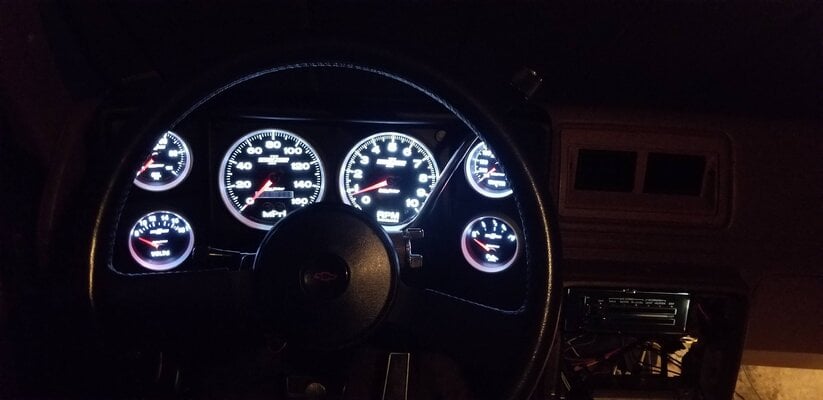
I'm not sure if you are working on a Malibu/El Camino, but if you are, here's what I did. This speedo is GPS and uses no cable, however, I changed everything.Installed LED cluster bulbs...win
Installed NOS speedo cable...nada
I don't get it. I have never had problems with a cable-driven speedo other than melting one, but this car just will not work. Tested everything, all is good, cable spins, speedo spins and indicates, (I know the driven gear works because the speedo worked for about 3 miles when I first put the car on the road) put it all together using the OE routing...nada. I removed the clamp at the crossmember, maybe that will help. Tired of messing with it today, so it's a tomorrow job.
I guess if tomorrow doesn't bring joy it's going to be time to look into electric, although no one else drives it, and I can use the tach to gauge speed...at least in 3rd I can
Attachments
Any chance the drive gear is loose on the output shaft?Installed LED cluster bulbs...win
Installed NOS speedo cable...nada
I don't get it. I have never had problems with a cable-driven speedo other than melting one, but this car just will not work. Tested everything, all is good, cable spins, speedo spins and indicates, (I know the driven gear works because the speedo worked for about 3 miles when I first put the car on the road) put it all together using the OE routing...nada. I removed the clamp at the crossmember, maybe that will help. Tired of messing with it today, so it's a tomorrow job.
I guess if tomorrow doesn't bring joy it's going to be time to look into electric, although no one else drives it, and I can use the tach to gauge speed...at least in 3rd I can
- Status
- Not open for further replies.
Similar threads
- Replies
- 106
- Views
- 5K
- Replies
- 176
- Views
- 12K
- Replies
- 983
- Views
- 63K
- Replies
- 79
- Views
- 3K
GBodyForum is a participant in the Amazon Services LLC Associates Program, an affiliate advertising program designed to provide a means for sites to earn advertising fees by advertising and linking to amazon.com. Amazon, the Amazon logo, AmazonSupply, and the AmazonSupply logo are trademarks of Amazon.com, Inc. or its affiliates.


