What Did You Do To Your G-Body Today? [2022]

Status
Not open for further replies.
Washed the car again, still need to clay bar it) and use iron remover before any detailing. This car sat for over 10 years in my uncle's garage. I put the 235/70/15 wheels and tires from my Monte Carlo on it just to see how it looked. I have an appointment with my mechanic coming up in two weeks, so I'm trying to knock some stuff out before then.

collage.jpg
 
Went after the lower edge on the inner door skin again to see if I could persuade the wicked warp in the centre of the flange to play nice and move back into position. No Joy so out came the saw and I made several relief cuts along the full length of the bottom face to get it to relax. That worked but it still looks like I am going to have to reshape the curve to add some more radius to it, aka make it rounder. Would have tried that today but my lungs decided that they wanted to have a coughing fit so I had to shut down and retreat back into the house. Not sure if it was the cold or the damp that triggered it but I can assure anyone reading this that coughing and coughing to the point where your back muscles start to complain and want to spasm is no fun at all.

Maybe if I order a new inner door skin, I can get one just before the Birkenstock brigade finally manages to put a bounty on the heads of us neo-luddite fossil fuel abusers. Any consolation here might come from them having to pay more for their granola due to grain shortages from the drought.


Nick
 
  • Like
Reactions: 83MonteCarloSS
Washed the car again, still need to clay bar it) and use iron remover before any detailing. This car sat for over 10 years in my uncle's garage. I put the 235/70/15 wheels and tires from my Monte Carlo on it just to see how it looked. I have an appointment with my mechanic coming up in two weeks, so I'm trying to knock some stuff out before then.

View attachment 193551
Man did that clean up well
 
So the relief cuts did allow the lower flange to relax and move around. So much so that I added one more cut to the row to get it to relaz for almost the complete length of the flange

The first attempt to add tacks to start the process of filling the cuts did not go well. While I had achieved the movement I wanted, trying to simply weld everything back together was not lifting the flange up to where it would fall into a straight line.

The cure involved a visit to my buddy's shop to see if he had any square and round bar. Found some 5/8ths square and 3/4 round and proceeded to cut it into the lengths I needed and fabricate an "H" shaped dolly with 7" long legs, one round, one square. By then using a pari of vice grips I could locate it at the point where two of the faces intersected in a bend and "adjust" that bend using a third pair of v-grips with "P" shaped jaws.

Did that for a while until i was more or less happy with how all the cuts lined up and how the lower flange seemed to lie and then reset the bar guide into place to see if the whole thing was actually lined up. Apparently I had managed to get it to play nicely with itself (insert series of sniggers here😏) so I left the guide clamped in place and moved on to other things.

Other consisted of mostly sorting stuff into tote boxes; you know the drill so moving on again.

The current plan is to head back into the shop tomorrow and lay a few tacks here and there to hold things together as they are and then pull the guide to see if it all stays the way it was while clamped. If so then back will go the guide and a few more tacks will get added to the stack; Lather, Rinse, Repeat. For additional kicks there are still few thin spots or blowouts where the old metal couldn't tolerate the addition of heat and wire to them so they need some MIG wire love as well. This might just turn into a prolonged exercise of add some tacks, check the shape, add some tacks, check the shape, add some tacks, check the shape......................................

I will be glad when I can finally clean this thing for the last time, throw a coat of OEM grey at it and then set the new skin in place. The Only reason I am being so picky is that if the inner skin is not right then the outer skin will end up being twisted and warped; I am NOT going to sacrifice a brand new door skin for which I had to wait almost two years to get, just because the inner skin has issues. If I can't get the inner skin as close as possible to correct, I will finish gutting it and turn the corpse into wall art. I have the passenger's side still to go and have a candidate in stock for that if the current door can't be saved/reskinned.

Pictures?? Nope. No way am I allowing the camera anywhere near the shop while i am fighting the good fight with this recalcitrant lump of obstinacy. I don't need it to become collateral damage because it got into harm's way for some reason.


Nick
 
Nothing yet but a friend of mine dropped off a few boxes of Cutlass parts for me. Apparently his friend passed and he's cleaning out the garage. At a quick glance there's like 4 dashboard wire harnesses all bagged and tagged but one is Monte Carlo the rest Cutlass several Cutlass dashboard bezels like all of them in really good shape there's some switches clocks that kind of thing but what blew me away was the 3 Cutlass rally dashes one with tachometer delete just like the one in my 78. I guess now I don't have to hunt down gauges or anything to get mine working properly. There's also a few Pontiac parts in there but I know I guy with a green Bonneville EFI V6 down south of me I'll give them to. Of course when I sent him a picture of the Bonneville parts he seen the gauges in the background and immediately wanted to buy them for his other project lol. Well that's it got to go get an alternator I'm sure this stuff will show up in my posts and when I decide I don't need what I don't need I'll post it up.
 
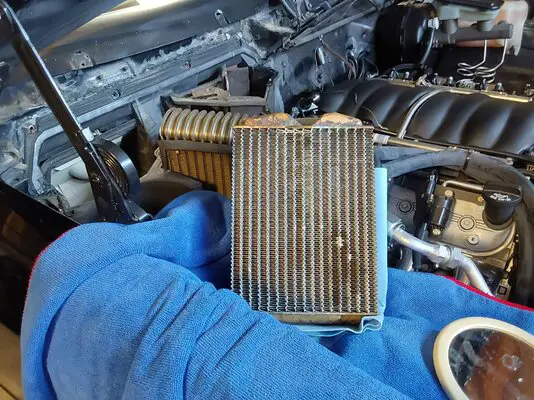
Had the monte out this past monday, noticed antifreeze smell. Could not find any visible leaks. Ordered a heater core arriving today. pulled the old one yesterday, it has just a little weepage going to change it out when new one arrives. oh do I need to have a 50 page thread for this change out.LOL
 

Attachments

  • 20220305_112508.jpg
    20220305_112508.jpg
    1.1 MB · Views: 67
Last edited:
I'll be replacing my heater core as soon as I can make time. I'm also going to replace the evaporator too since I'm there and it was the only piece not replaced when I did the AC last year. I already have the parts. I just need to set aside the time.
 
Had the monte out this past monday, noticed antifreeze smell. Could not find any visible leaks. Ordered a heater core arriving today. pulled the old one yesterday, it has just a little weepage going to change it out when new one arrives. oh do I need to have a 50 page thread for this change out.LOL
Only if you did all your research first and hate taking other people's advice. 😂
 
I'll be replacing my heater core as soon as I can make time. I'm also going to replace the evaporator too since I'm there and it was the only piece not replaced when I did the AC last year. I already have the parts. I just need to set aside the time.
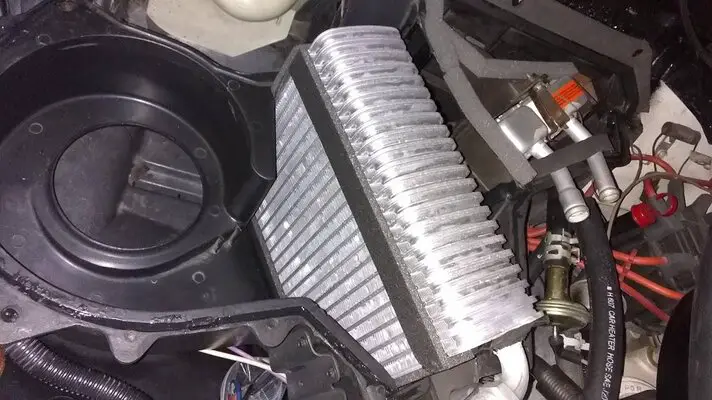
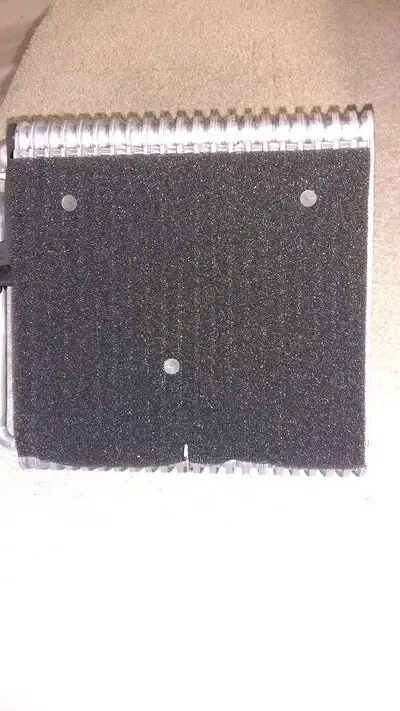
I did my 87 SS. It is a bear to remove the top cover alot of cussing and crying but it did come out in one piece. The screws around the perimeter are easy. There are some inside the box that you can access when you take out the blower motor. Mine had a lot of dry plastic sealer. Take your time with a spatula and work your way around the perimeter to break the seal. Make sure to vacuum and wipe down the inside of the box. Buy the foam from any store to replace the foam inside the box divider and filter material.
 

Attachments

  • Evaporator, Heater Core (8).jpg
    Evaporator, Heater Core (8).jpg
    100.7 KB · Views: 66
  • Evaporator, Heater Core (5).jpg
    Evaporator, Heater Core (5).jpg
    73.2 KB · Views: 64
  • Like
Reactions: Texas82GP
Status
Not open for further replies.

GBodyForum is a participant in the Amazon Services LLC Associates Program, an affiliate advertising program designed to provide a means for sites to earn advertising fees by advertising and linking to amazon.com. Amazon, the Amazon logo, AmazonSupply, and the AmazonSupply logo are trademarks of Amazon.com, Inc. or its affiliates.

Please support GBodyForum Sponsors

Classic Truck Consoles Dixie Restoration Depot UMI Performance

Contact [email protected] for info on becoming a sponsor