Sean's 78 Camaro Z28

Should we leave the wheels grey or paint them body color?

  • Leave grey

  • Paint blue to match the body car, the way the car was when new


Results are only viewable after voting.

Rktpwrd

Builder of Cool Shjt
Supporting Member
Feb 2, 2015
4,151
23,827
113
Calgary, Alberta, Canada
What is that? I've never seen one. Doesn't say much, but I do appreciate the rare weird stuff that occasionally gets put out.

Malibu S3 Laguna. They have somewhat of a cult following.
 
  • Like
Reactions: 1 user

g3chevy

Greasemonkey
Jan 30, 2019
120
270
63
Spring, Texas
What is that? I've never seen one. Doesn't say much, but I do appreciate the rare weird stuff that occasionally gets put out.
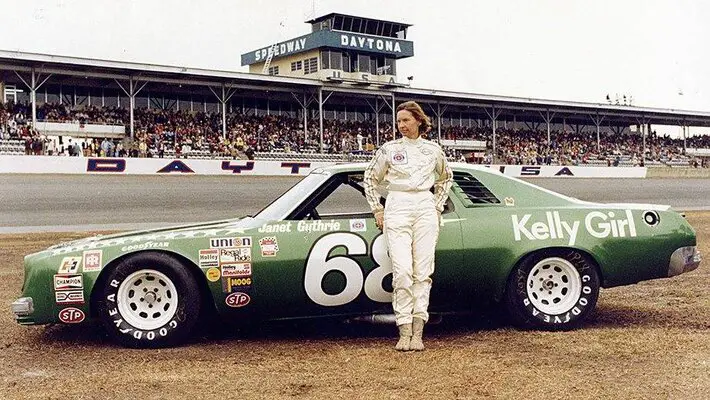
Its a 1975 Chevelle Laguna S-3. Chevy dropped the SS model in 74 and produced these from 74 to 76. They were sold in limited numbers to the public so they could race them in NASCAR back in the day.

1976-nascar-2.jpg


Janet-Guthrie-Laguna.jpg


Heritage-Museum-NASCAR Laguna.JPG
 

Attachments

  • Janet-Guthrie-Laguna.jpg
    Janet-Guthrie-Laguna.jpg
    118.3 KB · Views: 158
  • Like
Reactions: 4 users

Texas82GP

Just-a-worm
Apr 3, 2015
7,981
18,676
113
Spring, Texas
Yup, that was my work in progress that he saw. The guys I met up there were F body folks as well and they commented on how well done Sean's Z turned out. I'll be sure to introduce myself next time I see him up there. Hope to see you at one of the shows too. Love to see your GP in person.
Thanks. I hope to see you out there sometime soon. I love those colonnade A-Bodies, especially the Laguna and the Can Am. Dad wanted to go tonight but Sean and I pushed pretty hard today and just didn't have the car show in us tonight.

I really appreciate the kind words on my brother's Z28. It's not perfect. We just did the best we could. I'm really proud of it and love to see my brother enjoy the car he always wanted.
 
  • Like
Reactions: 1 users

Texas82GP

Just-a-worm
Apr 3, 2015
7,981
18,676
113
Spring, Texas
A few weeks ago my brother took his wife out to lunch in the car. When he pulled the door shut, the armrest broke at the front end and pulled off the door. A screw and some broken plastic was left on the door.

We recently had the armrest and door panel off on this side to repair loose material at the bottom of the panel. My immediate diagnosis was I must have overtightened that front screw.

We initially looked into buying a new armrest. You can get just a single (driver or passenger) armrest if you want to buy a black one and paint it. That's not what we did when we put the car together. Instead, we bought a light blue pair since they were the right color, and we needed a pair.

Painting a black one wasn't going to match and another light blue pair was going to run a couple hundred bucks. What to do?

In researching the issue I learned this failure wasn't my fault but rather, is an old, common problem for many GM models from that time, including 78-82 Malibu's.

I became aware of a repair kit that is an old fix from the time and is still available. For $13, Sean and I were willing to gamble on it. When the repair kit came in, we were delighted to find it was old stock, made in the USA.....

20210523_094734_copy_1134x2016.jpg


The back side with applications and repair instructions...

20210523_094745_copy_1134x2016.jpg


So last weekend, we fixed the armrest. First, you pull the armrest off the door as well as the front screw along with any broken plastic under it. Then you put the broken plastic back in the armrest. I didn't get a pic of the broken piece, but in doing this step I realized I wasn't at fault for the failure. I didn't overtighten the screw. The failure was inboard of it. You're just pulling on plastic when you pull the door shut. It's a terrible design. There is no good reason to buy a new armrest. It will just fail the same.

The next step is to install the metal repair sleeve....

20210523_101856_copy_2016x1134.jpg


Next you drill a small hole for a screw that goes into the plastic "chasis" of the armrest. Then install the screw.....

20210523_101849_copy_2016x1134.jpg


20210523_102519_copy_2016x1134.jpg


Then back on...

20210523_103118_copy_2016x1134.jpg


It's hard to see it. You have to look for it....

20210523_103106_copy_2016x1134.jpg


20210523_103126_copy_2016x1134.jpg


It's a great repair. We were happy enough with it that we ordered another kit last week and preemptively installed it on the passenger side today. It will never be a problem on either side again.
 
  • Like
Reactions: 5 users

g3chevy

Greasemonkey
Jan 30, 2019
120
270
63
Spring, Texas
Thanks. I hope to see you out there sometime soon. I love those colonnade A-Bodies, especially the Laguna and the Can Am. Dad wanted to go tonight but Sean and I pushed pretty hard today and just didn't have the car show in us tonight.

I really appreciate the kind words on my brother's Z28. It's not perfect. We just did the best we could. I'm really proud of it and love to see my brother enjoy the car he always wanted.
Looking forward to catching up with you at the next one. You all did an amazing job on the Z. The blue paint job really stand out. Is that a factory color?
 

Texas82GP

Just-a-worm
Apr 3, 2015
7,981
18,676
113
Spring, Texas
Looking forward to catching up with you at the next one. You all did an amazing job on the Z. The blue paint job really stand out. Is that a factory color?
Yes that's the original paint color and decal package. The light blue interior with navy blue carpet is also how it was new. The bright blue in the seats is a modification. They were light blue/navy blue from the factory. It had that style of wheels stock, but they were 15's and were body color, originally.
 
  • Like
Reactions: 1 user

Texas82GP

Just-a-worm
Apr 3, 2015
7,981
18,676
113
Spring, Texas
So many of you may have seen some of my updates on some of the other projects over my last week off, but a fair amount of time was also spent on a repair project on Sean's Camaro.

I bought him a set of floor mats from Lloyd's for Christmas. The first set of mats were from ACC and they didn't hold up too well. The car has about 7k miles on it since the "restoration" and the left front mat already had a hole worn through it from my brother's right heel. One of you fellows posted about Lloyd's mats on here and I was impressed with them, so that's what I got him for Christmas. The good news was he liked the mats. The bad news was that when he went to put them in the car, he noticed that the outside seat track for the Driver's side seat was broken.....
20211228_085811_copy_1612x1209.jpg


20211228_085834_copy_1612x1209.jpg


The previous time he drove the car he noticed something wasn't right. He was having trouble controlling the clutch how he normally did. He suspected the adjustment of the clutch pedal at the master cylinder under the dash but never said anything to me about it.

When he bought the car back from our uncle, back in 2006, the seat was broken the same way. When we rebuilt the seat, we replaced that track with a good used one. I did a little research after learning about this latest failure. New reproduction tracks are available for around $200/pair + shipping. I also found used original tracks available but most had been repaired in the same place or were really crusty. I came to understand that this is a common failure on these cars. We elected to fix what we had rather than replace it.

Out came the seat....
20211228_091046_copy_1612x1209.jpg


Off came the track. I chamfored the two pieces well and put them back together with the hot metal glue gun. Then I decided to add a piece of scrap across the top of the failure area to strengthen it....
20211228_121300_copy_1209x1612.jpg


When we pulled the seat, we noticed that there was a seat spring that was about to poke through the cover near the left front corner. We disassembled the seat and started pulling the cover. Here's a look at the offending spring sticking out of the 7k mile reproduction seat bun (foam)....
20211228_142010_copy_1209x1612.jpg


We decided the best thing to do with this was to bend it where the sharp end is pointing to the rear of the seat and bend it where it is pointing down.....
20211228_144614_copy_1612x1209.jpg


Next, I sacrificed a pair of cheap jeans that I've given up on ever fitting into again and we cut a small patch and glued it to the foam with contact cement...
20211228_145027_copy_1612x1209.jpg


20211228_150832_copy_1612x1209.jpg


In the pic above you can see where the backing on the leather has been damaged by the broken spring. We caught this just in time.

While pulling the cover loose, we discovered the lower seat spring frame was broken....
20211228_140634_copy_1612x1209.jpg


We welded it back together...

20211228_153830_copy_1209x1612.jpg


Then Sean painted the repair and where he stripped paint for the ground clamp...
20211228_160159_copy_1612x1209.jpg


Another issue, which we'd long known about, was that we had a paint failure on the lower seat plastic trim piece that finishes out the rear part of the lower portion of the seat. The areas where the seat back contacted it had areas where the paint cracked and separated due to either flexibility or adhesion problems. You would only see this if you leaned the seat back forward, as if someone was getting in the back seat. Still, we wanted to address this while we had the seat apart.

I took the trim piece to two paint stores trying to get some SEM Color Coat mixed to match. When we built the car, we used Dupont vinyl paint. Due to this difficulty, I really wanted to go with SEM. I ended up leaving the trim piece at the second store and we had to wait two days to get the paint. It was worth the wait. They did a great job with the match. Still, $120 for a quart of paint stung.

Unfortunately, I didn't get a picture of the paint failure before I started to prepare the part for the respray. I started out with a grey scotchbrite and the SEM "soap" and worked to get all the loose paint off. I also did some picking with my fingernails. Once I had the loose stuff off, I was left with a really hard edge where the remaing paint met the bare areas. I wet sanded with 600 grit sandpaper and dishwashing liquid to feather edge the transition. I put a fair amount of time into it and thought it looked pretty good. We set everything up and went ahead and painted it.

To be honest, I'm a little dissatisfied with the results. While the color is spot on and it looks 100% better, you can clearly see where the plastic was bare and where I feather edged it due to the varying amount of paint in the grain. I'm not sure what I could have done differently other than try to strip all the paint from the piece or replace it. You won't even see this unless if you lean the seat back forward and look for it but it still bugs me....
20211231_133916_copy_1612x1209.jpg


It looks waaaaay worse in this picture than it does in person. I got at the optimum angle and used the flash on the camera to make sure it showed up in the picture. Sean seems happy with the repair so at least there's that.

And that's where we're at. I ordered hog ring pliers and hog rings from Amazon, and they came in the next day, made in the USA! Unfortunately, the 3/8" hog rings I ordered weren't big enough so I had to order some more. They came in today but I didn't get home until after 7 so hopefully we'll get to it one night this week (what's left of it).

That's it for now friends. I'll follow up with an update when we make some progress.
 
  • Like
  • Winner
Reactions: 6 users

g3chevy

Greasemonkey
Jan 30, 2019
120
270
63
Spring, Texas
You have been busy! I had a similar issue painting some hard plastic interior parts with SEM paint. I ended up putting the plastic piece in the blasting cabinet with mild glass bead and stripped off all the chalky plastic then had sanded it to smooth it out. Then hit it with SEM texture spray and painted again. Looked great and lasted several years until I sold the vehicle.
 
  • Like
Reactions: 1 users

Texas82GP

Just-a-worm
Apr 3, 2015
7,981
18,676
113
Spring, Texas
Sean and I got the Driver's side seat for the Camaro back together on Saturday. I didn't take a lot of pictures. First, we replaced the hog rings we'd previously removed. That took a little for us to get the hang of. We'd never done it before. Next we put the lower trim on and I took the first pic...
20220108_101721_copy_2016x1512.jpg


Next we started getting the tracks back on it. One of the bolts didn't look too hot...

20220108_102048_copy_2016x1512.jpg


I don't remember it coming apart badly but the corresponding bolt hole in the frame didn't look good either...

20220108_102058_copy_2016x1512.jpg


We quickly found a good replacement bolt in the "seats and seat belts" box (exact match) on the shelf but we had to go to the storage for the thread chasers. I'm REAAALLY looking forward to having all our tools in one place.

We got the tracks installed and lubed them with a little spray white lithium grease, put on the seat back and then the hinge trim...

20220108_112740_copy_2016x1512.jpg


Back in service...

20220108_123412_copy_2016x1512.jpg


Sunday morning we got the car out and gave it a wash. My sister-in-law snapped a pic as we got done....

IMG_1171.jpg


Back on the road!
 
  • Like
  • Love
  • Winner
Reactions: 15 users

GBodyForum is a participant in the Amazon Services LLC Associates Program, an affiliate advertising program designed to provide a means for sites to earn advertising fees by advertising and linking to amazon.com. Amazon, the Amazon logo, AmazonSupply, and the AmazonSupply logo are trademarks of Amazon.com, Inc. or its affiliates.

Please support GBodyForum Sponsors

Classic Truck Consoles Dixie Restoration Depot UMI Performance

Contact [email protected] for info on becoming a sponsor