What Did You Do To Your G-Body Today? [2023]
- Thread starter 83MonteCarloSS
- Start date
You are using an out of date browser. It may not display this or other websites correctly.
You should upgrade or use an alternative browser.
You should upgrade or use an alternative browser.
- Status
- Not open for further replies.
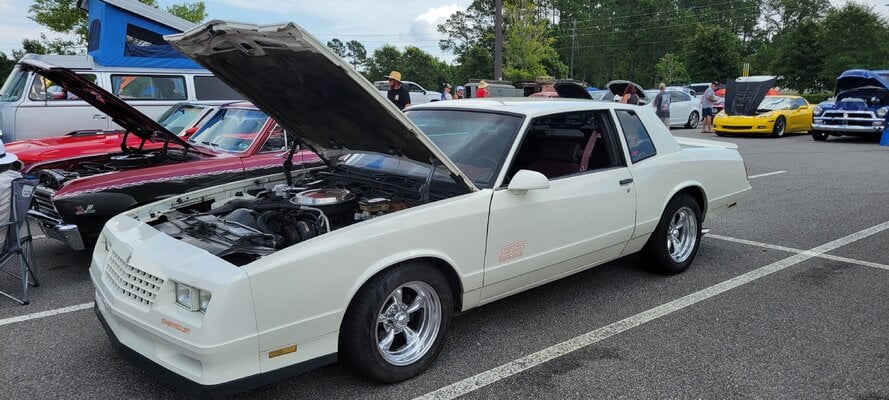
Finished up swapping mufflers from Pypes Street Pro's to Pypes Turbo Pro's, and installing a new lower speedo cable (68"- Restoparts CH20391 from Summit). I now have a functional speedometer after a year without one. Mufflers are waaay quieter, maybe too quiet to be cool, but no drone so far.
An 86 El Camino dropped at the local pull n save today and I ran down to check it out. It got hit real bad in the front but otherwise was solid. Had a V6. Not much going in the engine department. Checked inside and the seats were gone and the interior pulled apart. It had leather wrapped panels and dash with blue stitching. Probably looked real good back in the day but was trashed now. Someone trashed the dash trim and shadow box for the cluster unfortunately but I was able to get all 4 vents to have as spares. There was also some new parts mixed in with the junk, I grabbed a new rubber pad for the parking brake pedal which you can see on the bottom left. Also grabbed a better quality trim piece for my Impala console but still couldn’t find a good condition black leather armrest for it. Got a mirror/door gasket which looked new, but the other side was missing completely and the mirror was held on my wood screws into the door shell. Hate to see it. Got a warning indicator screen too which i plan to play with and see if i can add a couple more lights to it, including an indicator when my electric fans are on. Snagged a stay down license plate holder from a Camaro too which I’ll probably throw on the for sale section soon.


...
Took old carpet and benchseat out .bolted a pair of toyota buckets in (price was right) and man do they ride better.had to saw through 2 legs of the old bench used sawzall.use Milwaukee or dewalt /Bosch blades Irwin are junk..then sawed the nuts off the floor studs with cutoff tool ( rusted). Finally got the proportioner valve re-centered so I could bleed rear brake lines heres what I did .I took the rear line off at the rear exit on proportioning valve. I took a drill bit just big enough to fit into the open fitting (3/16"?). Yes I tapped(hammerd lightly) on the end with a claw hammer I could feel the shunt valve inside moving forward I think it moved 1/4"aproxamatly. Some other attempts to center the rascal had failed to work .the hammer and drill bit did the job allowing me to bleed rear brakes .For some reason I had to loosen the master cylinder itself by about 1/8"...it refused to(pass fluid) it drew on into the lines .It was just swishing out and sucking it back.i maybe putting 2 washers behind the mastercylinder .Let me tell you this old rust car brake system has held me off fir several trys at getting the rear pressure to work if you think what im saying is strange just think how I feel.lol...I'm going to replace the booster soon (yess with an s10 unit) so more fun is probly in-store for me.let me mention should you be thinking of pulling an s10 booster ....?... you better have a couple wobble sockets maybe a universal drive on hand and a couple medium lenth sockets ( 15 mm or 5/8". And 2- 1 foot extentions (3/8)You have to drop column also nuthing like the mc.... what black mould..

Took old carpet and benchseat out .bolted a pair of toyota buckets in (price was right) and man do they ride better.had to saw through 2 legs of the old bench used sawzall.use Milwaukee or dewalt /Bosch blades Irwin are junk..then sawed the nuts off the floor studs with cutoff tool ( rusted). Finally got the proportioner valve re-centered so I could bleed rear brake lines heres what I did .I took the rear line off at the rear exit on proportioning valve. I took a drill bit just big enough to fit into the open fitting (3/16"?). Yes I tapped(hammerd lightly) on the end with a claw hammer I could feel the shunt valve inside moving forward I think it moved 1/4"aproxamatly. Some other attempts to center the rascal had failed to work .the hammer and drill bit did the job allowing me to bleed rear brakes .For some reason I had to loosen the master cylinder itself by about 1/8"...it refused to(pass fluid) it drew on into the lines .It was just swishing out and sucking it back.i maybe putting 2 washers behind the mastercylinder .Let me tell you this old rust car brake system has held me off fir several trys at getting the rear pressure to work if you think what im saying is strange just think how I feel.lol...I'm going to replace the booster soon (yess with an s10 unit) so more fun is probly in-store for me.let me mention should you be thinking of pulling an s10 booster ....?... you better have a couple wobble sockets maybe a universal drive on hand and a couple medium lenth sockets ( 15 mm or 5/8". And 2- 1 foot extentions (3/8)You have to drop column also nuthing like the mc.... what black mould..

Last edited:
Yep" seems I posted in the oldHold up a minute, is there 2 instances of this thread?
Threw out the idea of finding custom shocks for proper travel, bought a set of KYB’s and made a pair of shock lowering brackets.


These extend the shock’s ride height to 16 inches from the 14-1/2 inches I had with the rear being lowered. Just need a pair of limiting straps and the rear suspension’s buttoned up.
Hopefully I won’t blow these shocks out like the Summit ones….


These extend the shock’s ride height to 16 inches from the 14-1/2 inches I had with the rear being lowered. Just need a pair of limiting straps and the rear suspension’s buttoned up.
Hopefully I won’t blow these shocks out like the Summit ones….
Wednesday night after work my faithful heater hoses with probably 137,000 miles on it decided to explode and look as if it lost a knife fight while gently merging onto the highway. And of course it blew between the longest stretch of no off ramps on my whole drive home so I had to drive 6 miles spewing steam and coolant all over the place. I got it to a Hy-Vee gas station, looped the heater hose, used my car care bucket I keep in the trunk to fill the rad using the station's kitchen sink. Ig the pressure from the hose or whatever blew my push in oil cap away so I had to buy one of them as well. Fixed the hoses Thursday night after work in the parking lot. Seems fine so far.


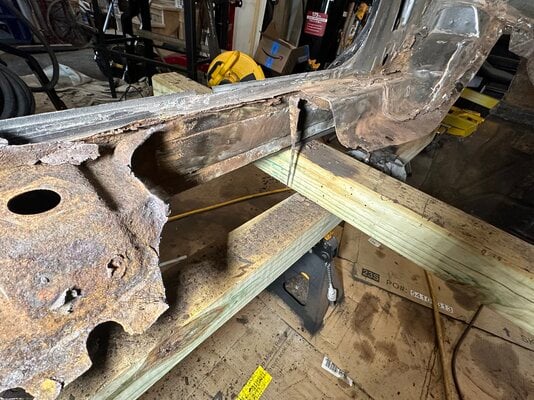
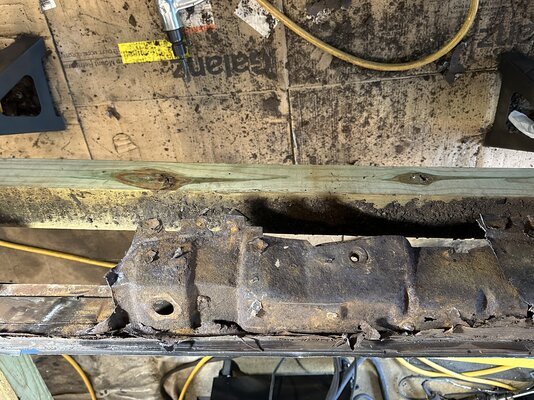
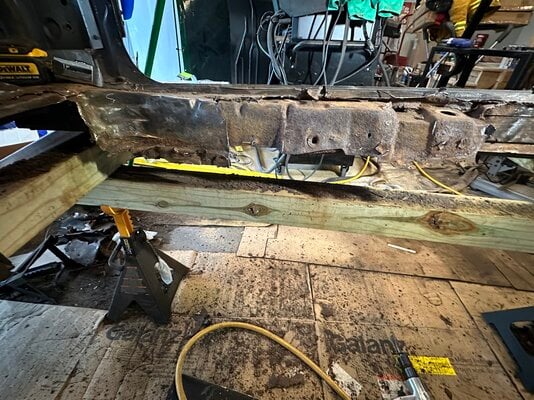
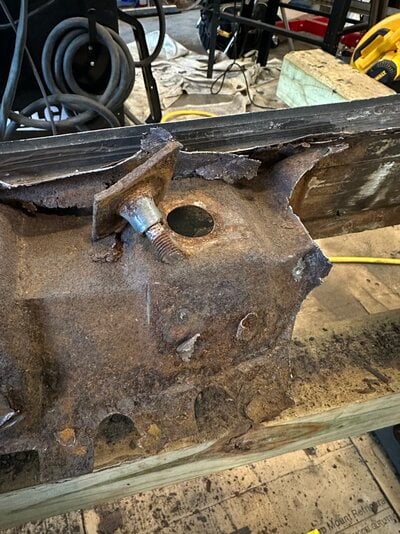
Ok you ever get deep into something and realize you’re way past your limits? Yup that’s me. I then turned to the forums and saw that Nick had posted the same issue but as I unfolded rusted floor pan and then the layers of rusted sill “edge” that needed replaced I found number three body z bolt that needs the sleeve. Yeah I broke that one awhile back when I was taking the body off, I’ll fix that later I said… well it’s later and now before I can put the new floor pan in I have a lot to fix!! Here’s some pictures you can reference if you go back and read nicks well explained article about what he also ram into. These are the drivers side and the hole is where #3 cage should be. Lots of fab work to do because they don’t make this. And I don’t have access to a doner.
Attachments
Wee-ell, if you can get the corpse of the bolt out, you should be able to salvage the diamond and re-use it. After that, it can also be the buck or shape that you use to create a new housing with. That would involve a section of sheet mefal and a pair or two of vice grips or even a bench vice to clamp the metal to the diamond while you use a hammer to convince it that being deformed from flat to fit around the diamond shape is a good thing. As you push the metal it will tell you where you need to cut, mostly at the corners, to get it to lie down and sit right. Leave some extra as once you make the pocket you will need it to make the ears or tabs that you will use to weld it back in place.
Don't go for a tight fit between the two. Leave a little space for the diamond to shuffle around a little. With it able to float, should you not get it located absolutely back where it came from, the diamond can "adjust" its position a little to compensate.
Nick
Don't go for a tight fit between the two. Leave a little space for the diamond to shuffle around a little. With it able to float, should you not get it located absolutely back where it came from, the diamond can "adjust" its position a little to compensate.
Nick
- Status
- Not open for further replies.
Similar threads
- Replies
- 118
- Views
- 5K
- Replies
- 191
- Views
- 12K
- Replies
- 983
- Views
- 64K
- Replies
- 80
- Views
- 3K
GBodyForum is a participant in the Amazon Services LLC Associates Program, an affiliate advertising program designed to provide a means for sites to earn advertising fees by advertising and linking to amazon.com. Amazon, the Amazon logo, AmazonSupply, and the AmazonSupply logo are trademarks of Amazon.com, Inc. or its affiliates.


